I currently have a need to manage software on many machines at once, and Chocolatey seems to be the ideal solution. It’s like YUM or APT but on Windows. The community makes Nuget packages and anyone can use these do add, remove, or update software. So, to install everyones favourite text editor you can run this
choco install notepadplusplus -y
Then to update it (something Notepad++ loves doing) you can run this each day via a script.
choco upgrade notepadplusplus -y
You will never see an upgrade prompt ever again when you load it!
The issue is that if you use Chocolatey a lot you may hit it’s rate limits. So, if I have 5 machines, and I run a command to update all my programs each night, for 3 or 4 different programs, its generates a lot of requests to Chocolatey, and from a single IP address, they will throttle you. Suddenly, you are locked out from updates. This is annoying for home use, but for a company you really don’t want to be the person getting the IP blocked.
The Fix - A Private Chocolatey Server
The fix is to run your own Nuget caching server and tell your clients with Chocolatey to go to that. It means that you reach out to Chocolatey one time for package details, and then that is cached on a local Nuget repository. Don’t worry, this is nowhere near as difficult as it sounds!
Installing and Configuring Nexus Repository Manager
On a windows machine, install Chocolatey like so
Set-ExecutionPolicy Bypass -Scope Process -Force; [System.Net.ServicePointManager]::SecurityProtocol = [System.Net.ServicePointManager]::SecurityProtocol -bor 3072; iex ((New-Object System.Net.WebClient).DownloadString('https://community.chocolatey.org/install.ps1'))
Then, we can use chocolatey to install the open source Nexus Repository
choco install nexus-repository -y
Once installed, it should be available at http://localhost:8081
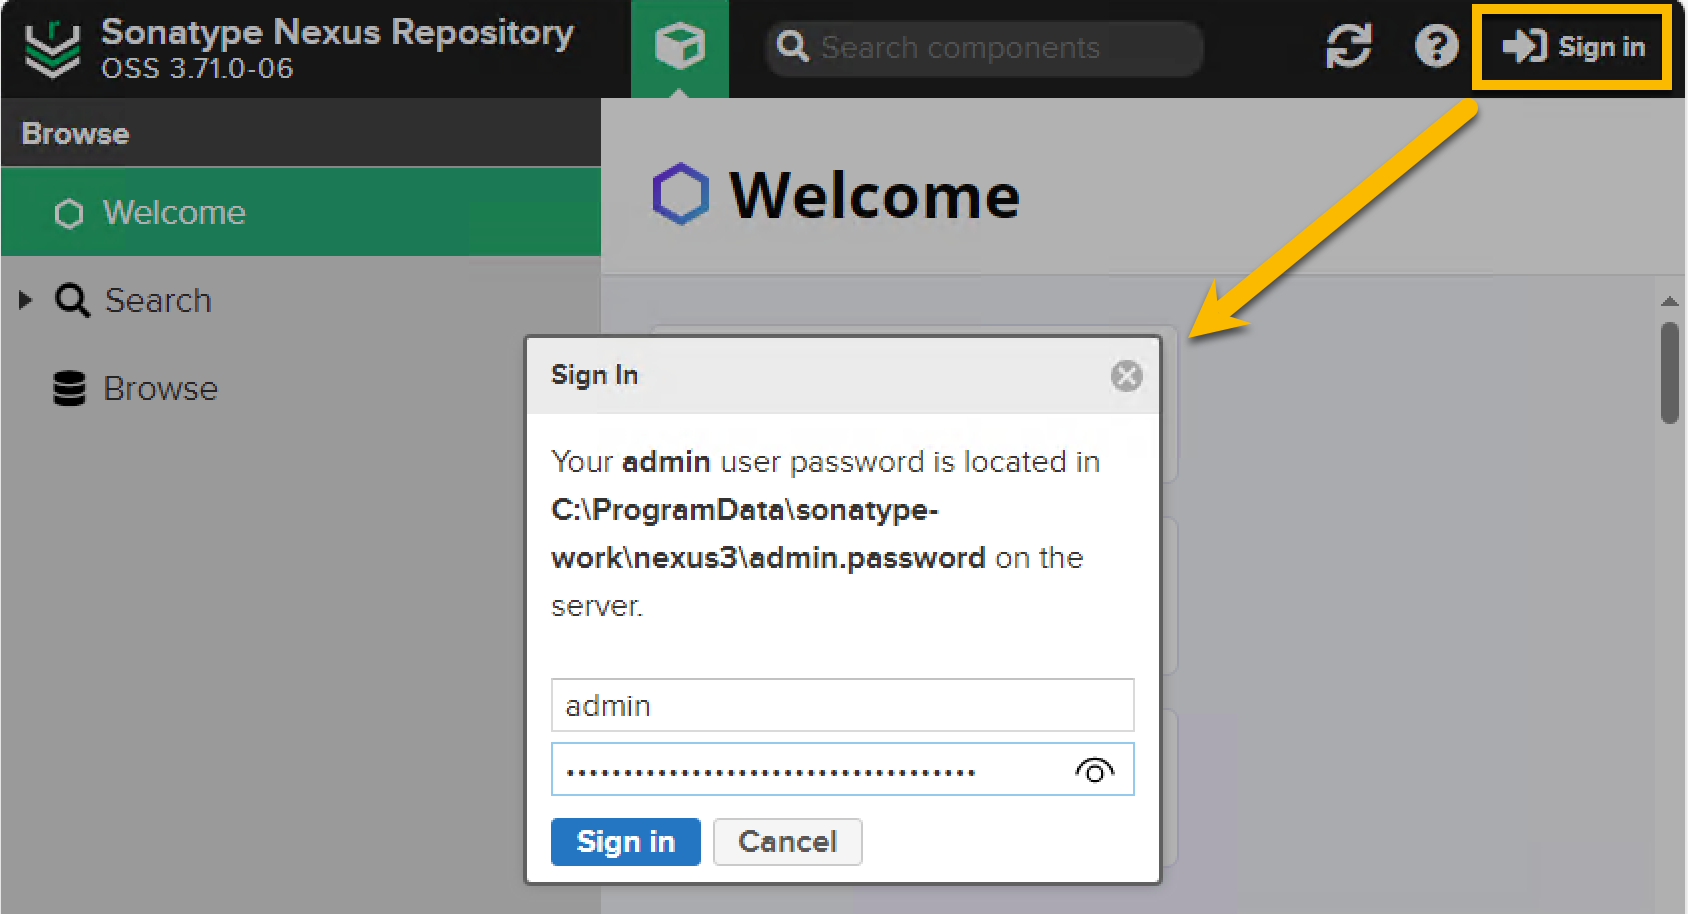
You need the admin password, which you can get like this
type C:\ProgramData\sonatype-work\nexus3\admin.password
Then login and change the password.
And choose to enable anonymous access

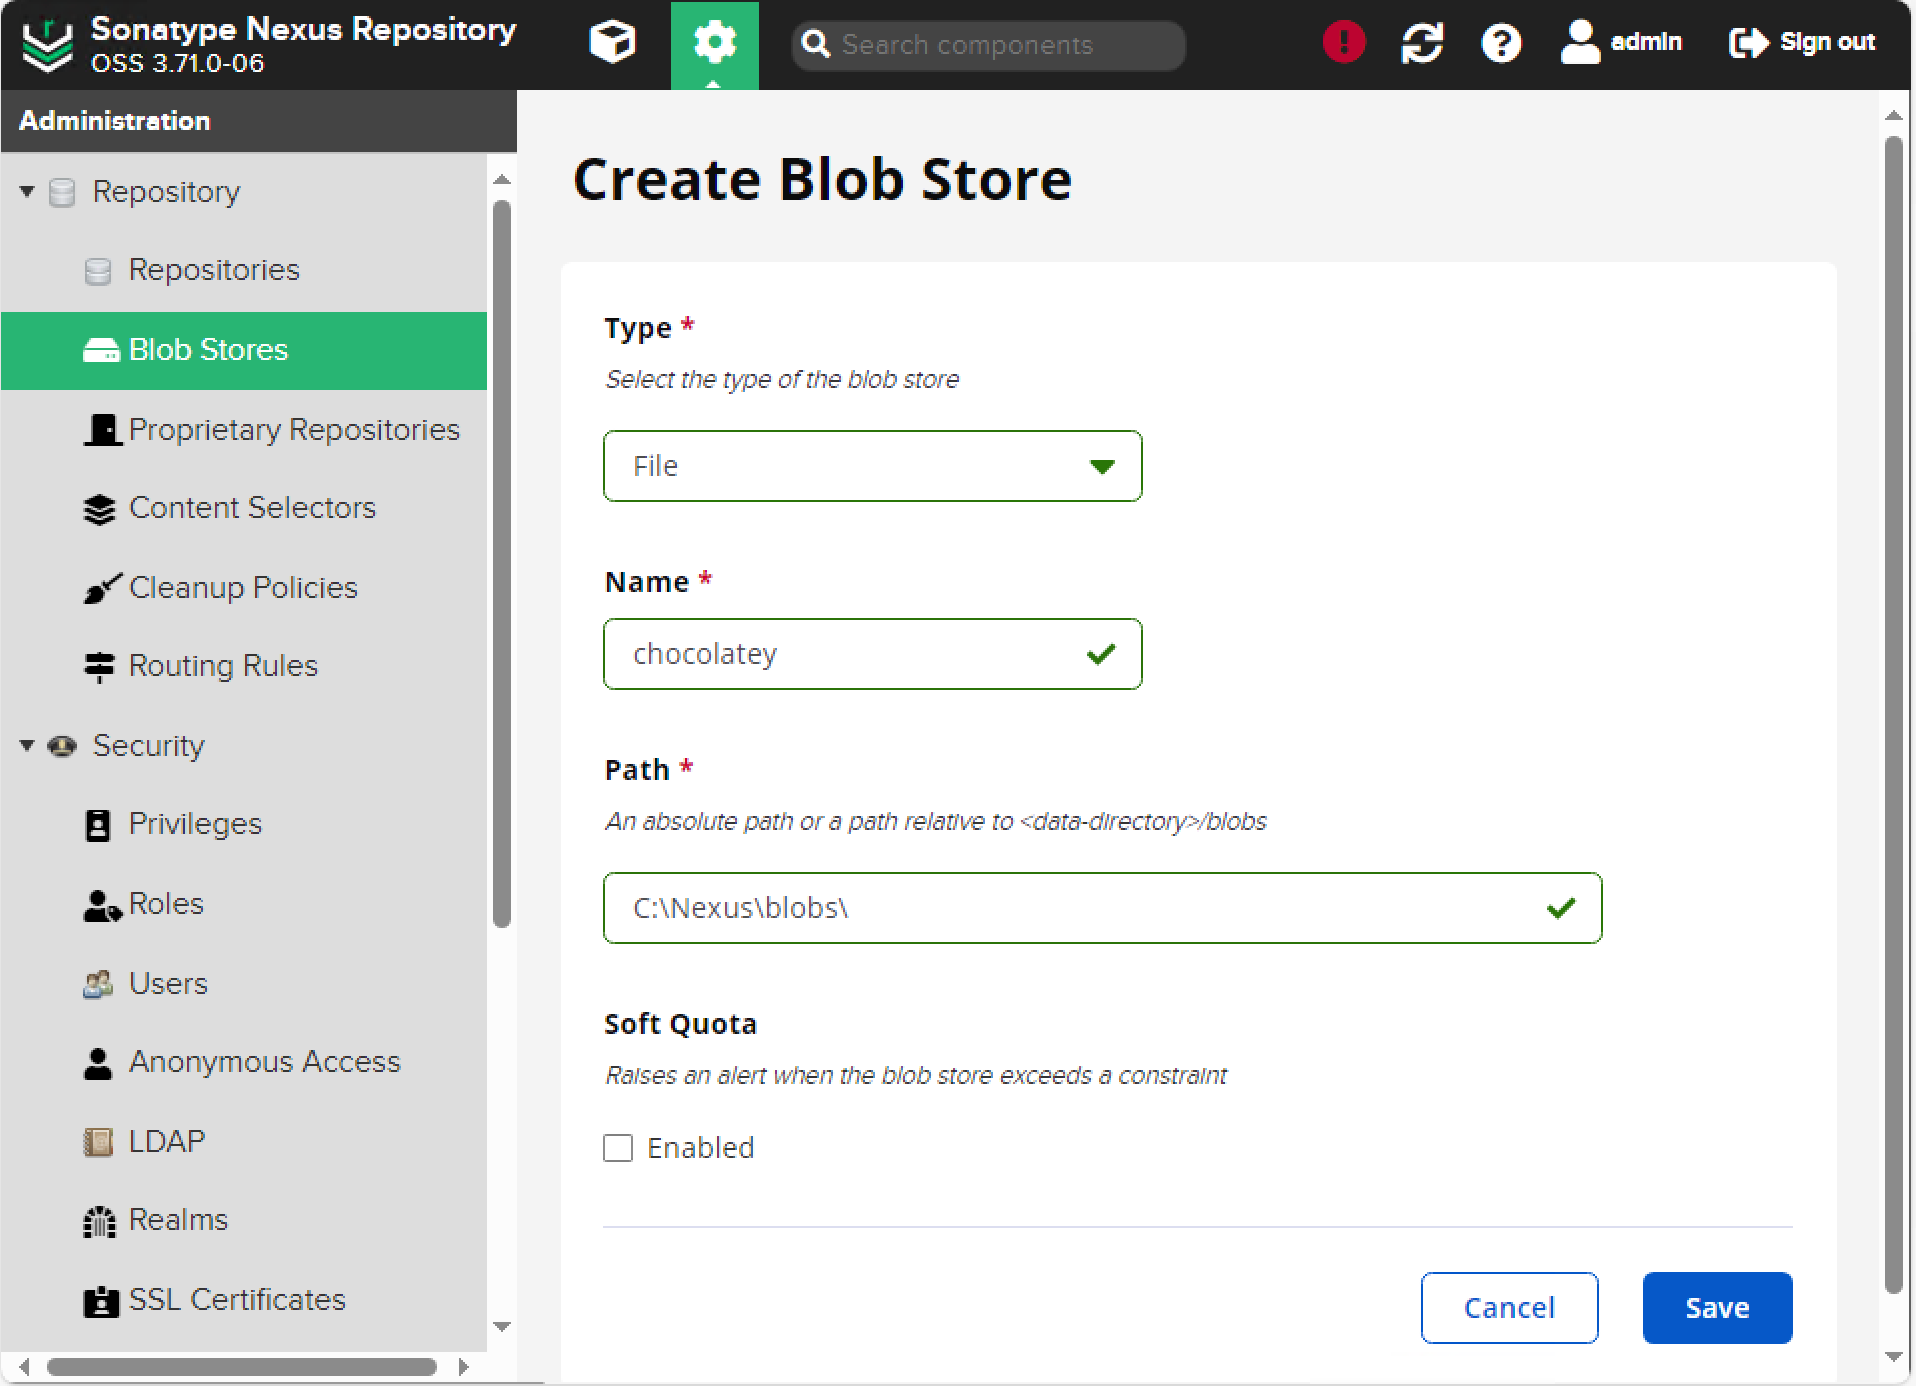
Then, we want to create a folder for our packages
mkdir c:\Nexus\blobs
And then we want to create a blob repository to hold the data.
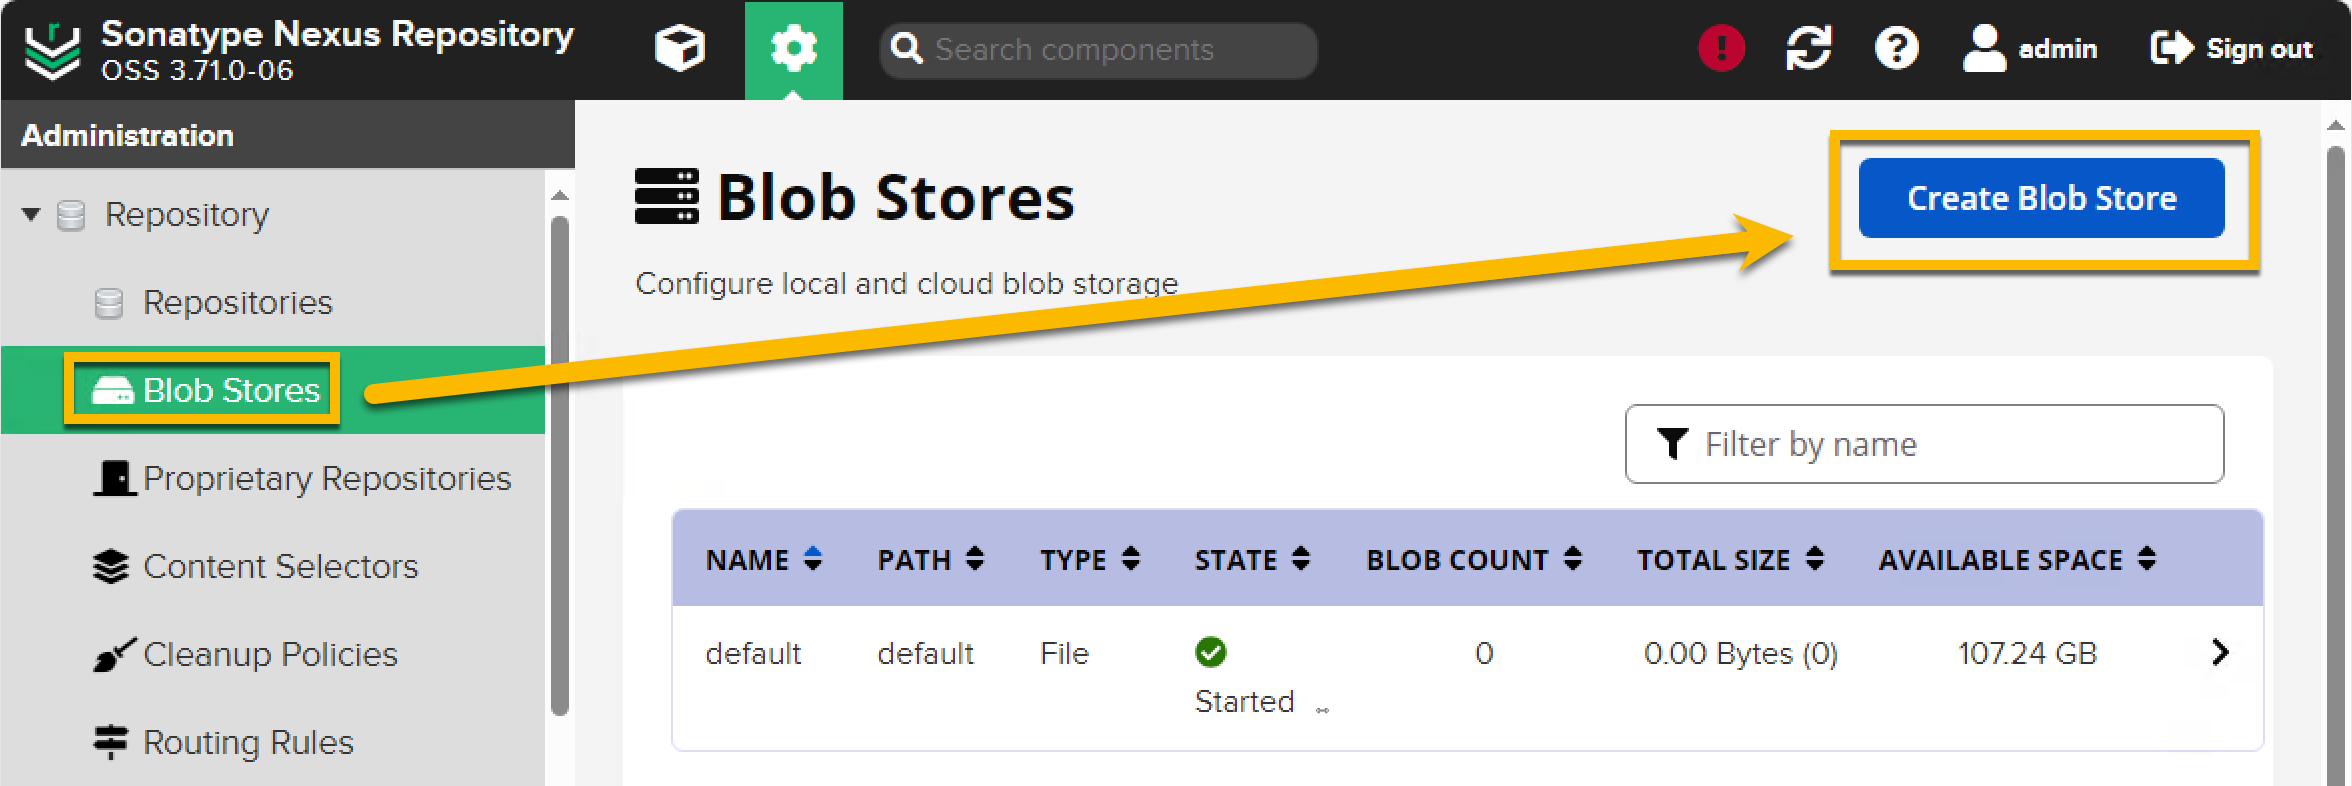
Once we have that we can create our Chocolatey repos, one a proxy to Chocolatey itself, and another to connect to directly. Then we put them into a group so they act as one repo.
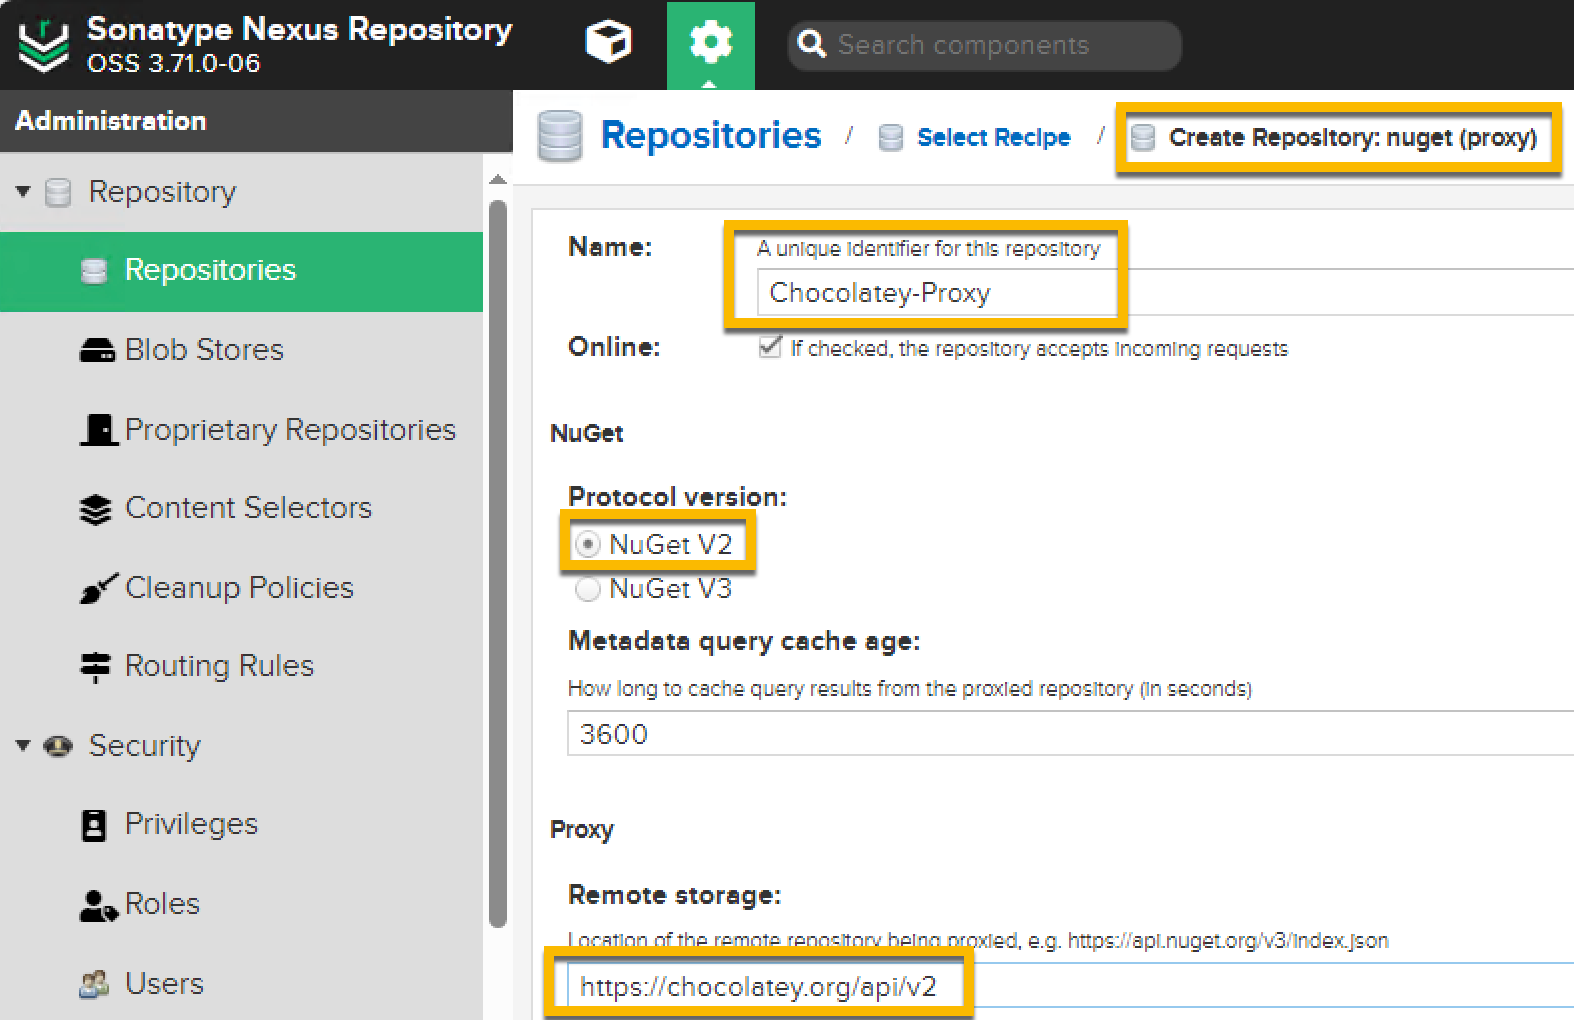
Create a ‘Nuget Proxy’ resource and put in these details.
| Name | Value |
|---|---|
| Name | Chocolatey-Proxy |
| Protocol Version | NuGet V2 |
| Proxy - Remote Storage | https://chocolatey.org/api/v2 |
| Storage - Blob Store | Chocolatey |
And hit save.
Then, create a ‘Nuget Hosted’ repo with these details
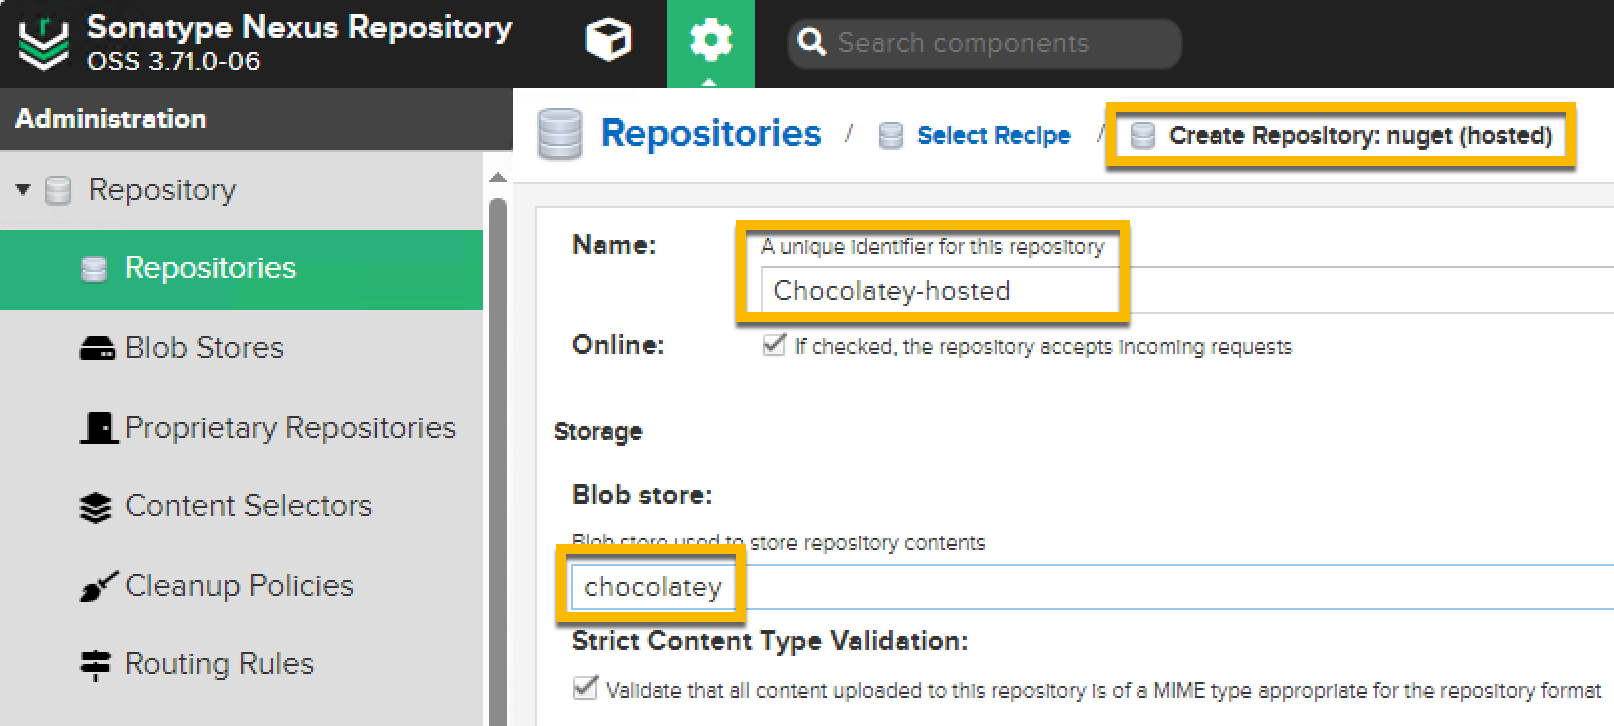
| Name | Value |
|---|---|
| Name | Chocolatey-hosted |
| Storage - Blob Store | Chocolatey |
And then, create a ‘Nuget Group’ with those two repos as members.
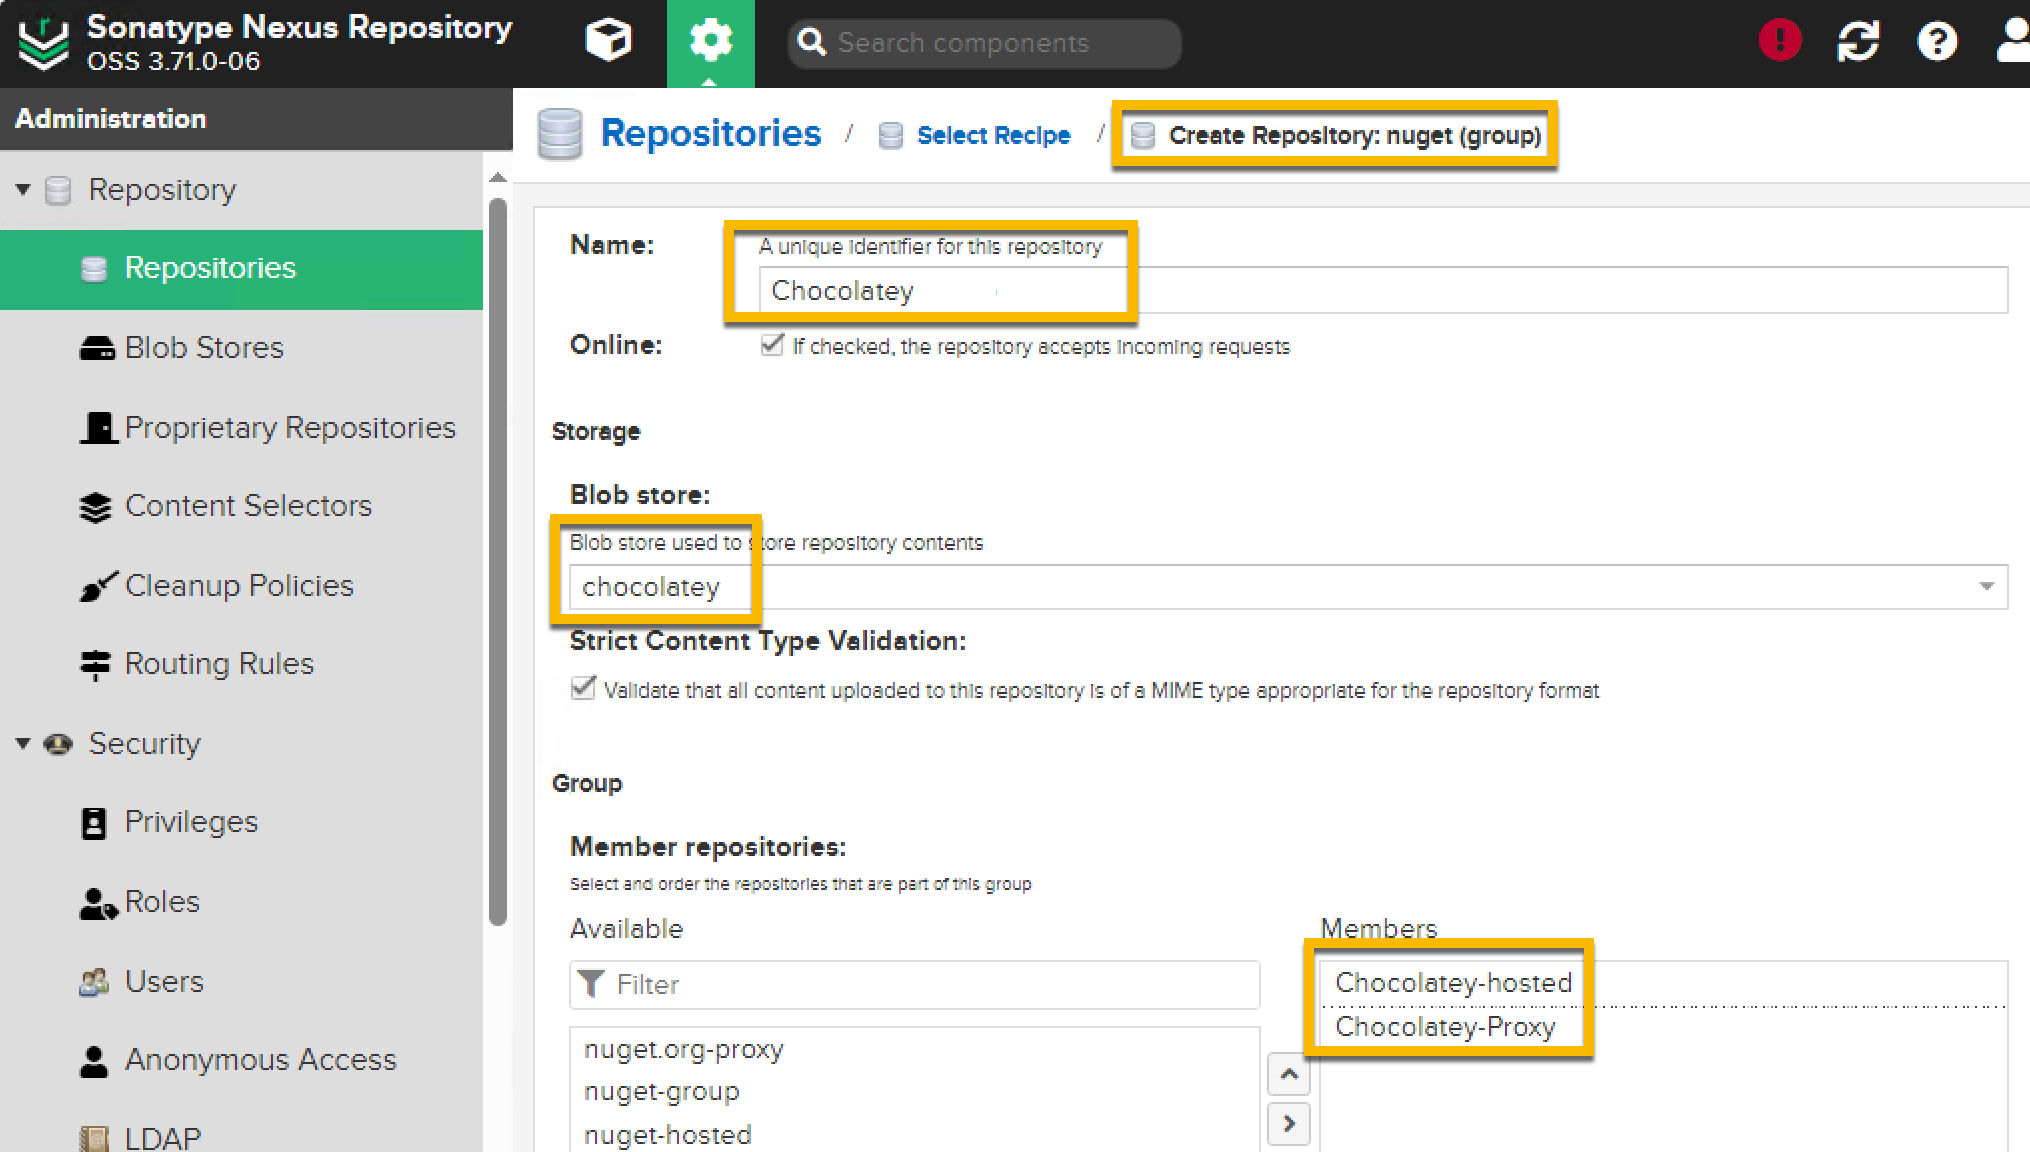
| Name | Value |
|---|---|
| Name | Chocolatey |
| Members | Chocolatey-Proxy, Chocolatey-hosted |
| Storage - Blob Store | Chocolatey |
Configuring Chocolatey
Okay, thats the hard part over. Now, from our machine with chocolatey installed (same as the Nexus server in this example, but any chocolatey machine in the same network can be used) we tweak the sources it uses. I amd going to presume the IP address of the machine is 192.168.1.100, so change to suit your own network.
choco source remove -n=chocolatey
  Chocolatey v2.4.2
  Removed chocolatey

choco source add -n=nexus -s=http://192.168.1.100:8081/repository/chocolatey/
  Chocolatey v2.4.2
  Added nexus - http://192.168.1.100:8081/repository/chocolatey/ (Priority 0)
If that works, you can now run this command to test things are working
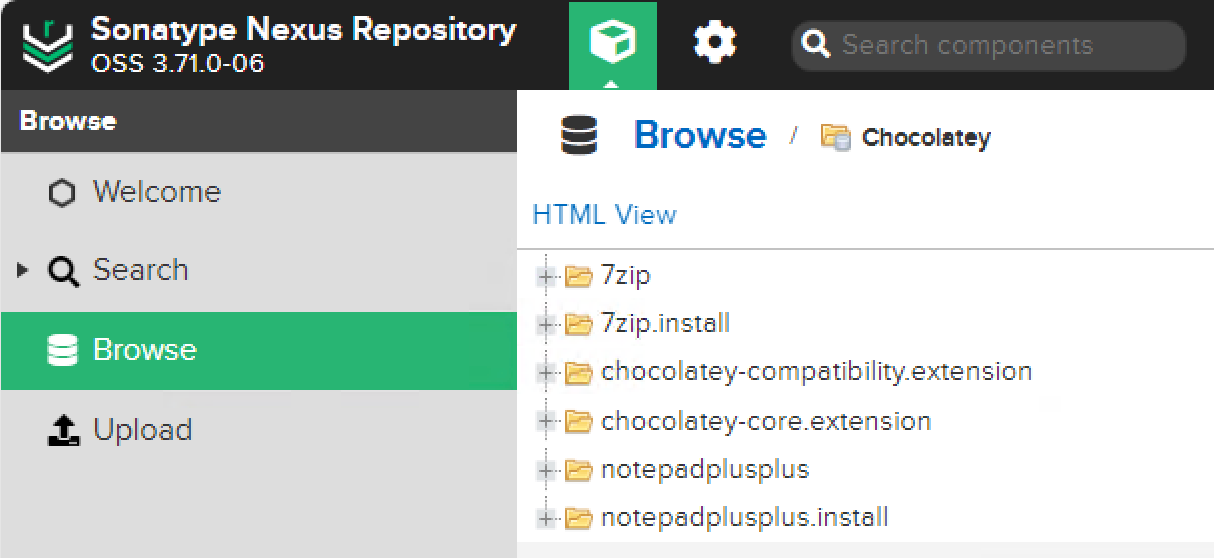
choco install notepadplusplus 7zip -y
The packages should install, and they should also be cached in the Nexus repository. You have cached these from the main Chocolatey server and will no longer hit it. Further installs will hit your cached copy, and not invoke rate limits!
And, just for info, the installer files themselves are not proxied, just the metadata, so it will be very light on disk space usage. On new machines a small script can install chocolatey and tweak the repos used. No more being blocked! Easy!