We are going to run a Windows VM inside of Kubernetes. This will be a long one.
We will do this by;
- Creating a QCOW2 Windows image with Packer and VirtualBox
- Installing KIND, Kubevirt, and utilities
- Deploying the VM using a Data Volume and a PVC claim
Once done, we can create Windows VMs on demand in Kubernetes.
Why? Well, imagine you want to run multiple old-school services, that are not easily containerizable. Say an IIS website with a SQL Server and some weirdo services that don’t work in a Windows container image. We can use this to host an instance per client on one large node pool instead of individual VMs and benefit from the Kubernetes ecosystem. Or, create many Dev machines that can easily be created and deleted on demand. We can do this as if they were pods!
Note: You probably need a pretty powerful machine to do this. I tried it on an Azure 4 CPU/16GB RAM machine and it kinda melted. A real desktop-style machine with an NVME drive is highly recommended due to the strain of creating the image and deploying it into a KIND cluster.
Required Files
Because of the complexity of the full setup, I’ve put all the files into a GitHub repo, links below. Where useful I’ll share a snippet. But it may be best to pull the zip/repo from Git Hub and follow along as the code would make this blog post very large and unwieldy.
Repository - https://github.com/rootisgod/Kubevirt-Cluster
Zip File - https://github.com/rootisgod/Kubevirt-Cluster/archive/refs/heads/main.zip
Creating a VM Image
To get to the stage of running a Windows machine in Kubernetes, we need a VM image. And for that, we need Virtualbox to create a VM, and Packer to make the image from it. And later qemu-img program to convert the VM file.
Note: For this guide, we are using Windows as the base OS to show the steps. It doesn’t change things too much if using Linux, but worth noting.
Installing Packer and Virtualbox
The easiest way to install Virtualbox and Packer is with Chocolatey (or install both programs manually if you know what you are doing). You can install Chocolatey with these instructions - https://chocolatey.org/install To install the programs, run this.
choco install virtualbox packer qemu-img -y
Windows ISO
We also need a Windows Server 2022 ISO. You can grab an evaluation licence ISO from here: https://www.microsoft.com/en-gb/evalcenter/download-windows-server-2022. I have placed it into a folder on my computer called D:\ISOs\windows_server_2022.iso. Update the location in the code further on in file windows.pkr.hcl and variable iso_url, with wherever yours is located.
Packer
Now we can think about deploying it with Packer. But, first, we need to install the following packer plugins so it can talk to Virtualbox, like so.
packer plugins install github.com/hashicorp/vagrant
packer plugins install github.com/hashicorp/virtualbox
Packer Windows 2022 Template
We can now create a VM with a packer template. The template is responsible for the full lifecycle of the image we create. It will create a VM in Virtualbox, install Windows via an answer file, and then connect to it over WinrRM to configure it and then shut it down. Once this happens it will output it as an image we can use later. So we need to give it quite a lot of information and scripts to make that happen.
This is the template we need to run. It has the VM spec and our build options. It should be pretty simple to understand. Tweak the values if you wish. Save it as a file called windows.pkr.hcl. It is also here
packer {
  required_plugins {
    vagrant = {
      source  = "github.com/hashicorp/vagrant"
      version = "~> 1"
    }
    virtualbox = {
      source  = "github.com/hashicorp/virtualbox"
      version = "~> 1"
    }
  }
}

source "virtualbox-iso" "windows" {
  vm_name              = "win2022"
  communicator         = "winrm"
  floppy_files         = ["files/Autounattend.xml", "scripts/enable-winrm.ps1", "scripts/sysprep_and_shutdown.bat", "scripts/shutdown.bat"]
  guest_additions_mode = "attach"
  guest_os_type        = "Windows2022_64"
  headless             = "false"
  iso_checksum         = "sha256:3e4fa6d8507b554856fc9ca6079cc402df11a8b79344871669f0251535255325"
  iso_url              = "d:/ISOs/windows_server_2022.iso"
  disk_size            = "24576"
  shutdown_timeout     = "15m"
  vboxmanage           = [["modifyvm", "{{ .Name }}", "--memory", "8192"], ["modifyvm", "{{ .Name }}", "--vram", "48"], ["modifyvm", "{{ .Name }}", "--cpus", "4"]]
  winrm_password       = "vagrant"
  winrm_timeout        = "12h"
  winrm_username       = "vagrant"
  keep_registered      = "false"
  # shutdown_command     = "a:/sysprep_and_shutdown.bat"
  shutdown_command     = "a:/shutdown.bat"
}

build {
  sources = ["source.virtualbox-iso.windows"]

  provisioner "powershell" {
    elevated_password = "vagrant"
    elevated_user     = "vagrant"
    script            = "scripts/customise.ps1"
  }

  # Add other script you want to run here, like Windows Updates, software installs etc...

  provisioner "windows-restart" {
    restart_timeout = "15m"
  }
}
And we need a few files in a couple of folders to take care of an unattended install, and some post-boot actions.
Scripts
The most important file is the enable-winrm.ps1 file. The answer file (below) references this and will run it once Windows is installed. It sets up winrm so that Packer can send commands to it once the OS is installed.
Get-NetConnectionProfile | Set-NetConnectionProfile -NetworkCategory Private
Enable-PSRemoting -Force
winrm quickconfig -q
winrm quickconfig -transport:http
winrm set winrm/config '@{MaxTimeoutms="1800000"}'
winrm set winrm/config/winrs '@{MaxMemoryPerShellMB="800"}'
winrm set winrm/config/service '@{AllowUnencrypted="true"}'
winrm set winrm/config/service/auth '@{Basic="true"}'
winrm set winrm/config/client/auth '@{Basic="true"}'
winrm set winrm/config/listener?Address=*+Transport=HTTP '@{Port="5985"}'
netsh advfirewall firewall set rule group="Windows Remote Administration" new enable=yes
netsh advfirewall firewall set rule name="Windows Remote Management (HTTP-In)" new enable=yes action=allow remoteip=any
Set-Service winrm -startuptype "auto"
Restart-Service winrm
We also need a sysprep_and_shutdown.bat and shutdown.bat file in a scripts folder to shutdown simply or Sysprep it to ‘randomise’ the VM on boot (both are useful). Use the one you prefer in the packer template. But a simple shutdown might be preferable initially to avoid the ‘new user’ login screen while testing.
sysprep_and_shutdown.bat
c:\windows\system32\sysprep\sysprep.exe /generalize /mode:vm /oobe
shutdown /s
shutdown.bat
shutdown /s
And we also need a customise.ps1 script to configure some small settings, and install Chocolatey and virtio drivers. Add/amend as you require. Choco being pre-installed is useful as you can add anything post-build very easily, or create another packer template provisioner section to add more software in a simple way.
# Set some Quality of Life Settings
c:\Windows\System32\reg.exe ADD HKCU\SOFTWARE\Microsoft\Windows\CurrentVersion\Explorer\Advanced\ /v HideFileExt /t REG_DWORD /d 0 /f
c:\Windows\System32\reg.exe ADD HKCU\Console /v QuickEdit /t REG_DWORD /d 1 /f
c:\Windows\System32\reg.exe ADD HKCU\SOFTWARE\Microsoft\Windows\CurrentVersion\Explorer\Advanced\ /v Start_ShowRun /t REG_DWORD /d 1 /f
c:\Windows\System32\reg.exe ADD HKCU\SOFTWARE\Microsoft\Windows\CurrentVersion\Explorer\Advanced\ /v StartMenuAdminTools /t REG_DWORD /d 1 /f
c:\Windows\System32\reg.exe ADD HKLM\SYSTEM\CurrentControlSet\Control\Power\ /v HibernateFileSizePercent /t REG_DWORD /d 0 /f
c:\Windows\System32\reg.exe ADD HKLM\SYSTEM\CurrentControlSet\Control\Power\ /v HibernateEnabled /t REG_DWORD /d 0 /f
c:\Windows\System32\reg.exe add "HKLM\SYSTEM\CurrentControlSet\Control\Terminal Server" /v fDenyTSConnections /t REG_DWORD /d 0 /f
netsh advfirewall firewall set rule group="remote desktop" new enable=yes

# Install Chocolatey
Set-ExecutionPolicy Bypass -Scope Process -Force; [System.Net.ServicePointManager]::SecurityProtocol = [System.Net.ServicePointManager]::SecurityProtocol -bor 3072; iex ((New-Object System.Net.WebClient).DownloadString('https://community.chocolatey.org/install.ps1'))

# Chocolatey Seems to cause a non-zero exit, cause a 500MB download, exits with a non-zero code and breaks the build... Lets install ourselves
$url  = 'https://fedorapeople.org/groups/virt/virtio-win/direct-downloads/latest-virtio/virtio-win-guest-tools.exe'
$dest = 'c:\virtio-win-guest-tools.exe'
Invoke-WebRequest -Uri $url -OutFile $dest
c:\virtio-win-guest-tools.exe -s
Files
And we need an answer file for Windows to skip the install questions. Importantly, this also references and runs the enable-winrm.ps1 script. It also makes a user called vagrant with password vagrant and auto-logins the account. Not entirely secure, but you could remove this account later and tweak as required once you understand it all.
The answer file is very large, so I’m just showing the winrm script portion here so you know how the magic happens. Virtualbox mounts it to the A: so Windows can read it in and set up the remote access for us.
The full file is here Autounattend.xml
You should now have this folder structure for this to all work
windows.pkr.hcl
Scripts\enable-winrm.ps1
Scripts\sysprep_and_shutdown.bat
Scripts\shutdown.bat
Scripts\customise.ps1
Files\Autounattend.xml
Building the Image
We can now build a Windows image using Packer and Virtualbox!
Run this command
packer build ./windows.pkr.hcl
It will whirr away and automatically create a Virtualbox VM, then show a console of the build, and then shut the VM down and export a VDI file in an output-windows folder. Just leave it alone and it will shut down automatically.
NOTE: If you get a checksum error, then the packer output should show what it got and what it expects, simply change the windows.pkr.hcl variable iso_checksum to what it expects.
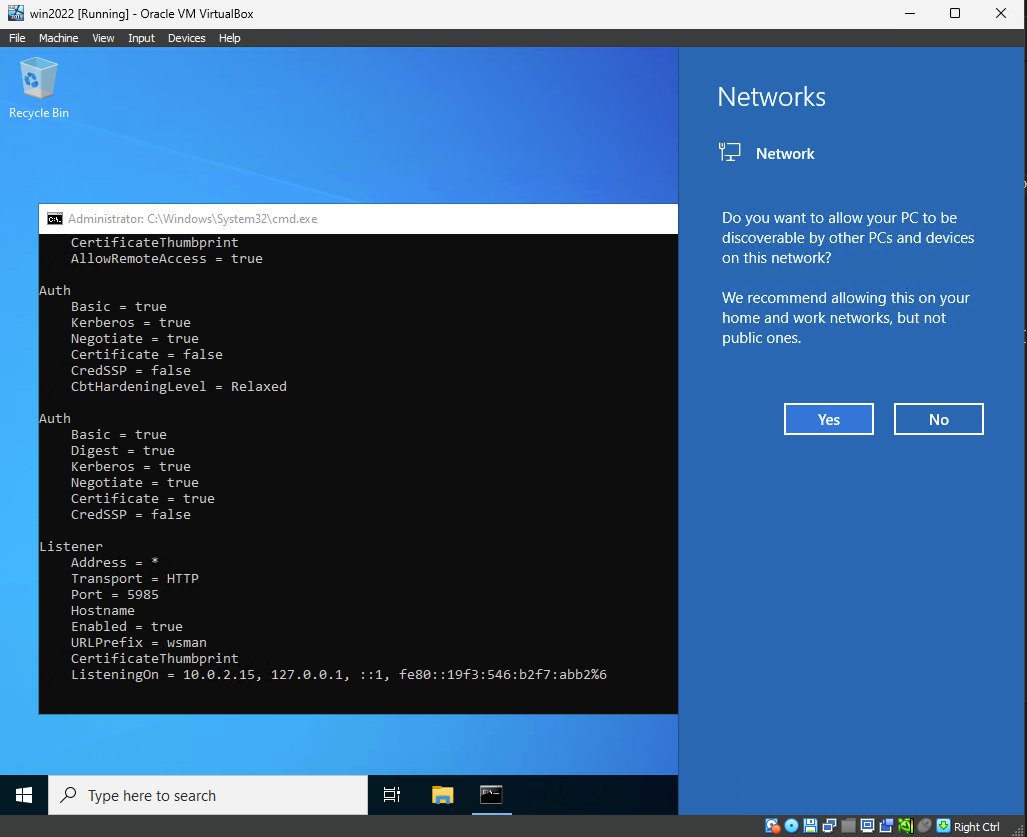
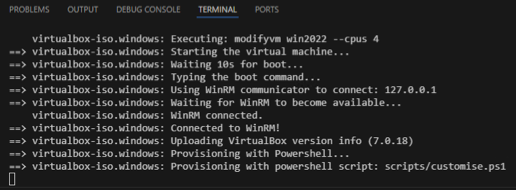
The terminal should log all this is going on.
Then, once completed, we can convert the file into a format required for Kubevirt like so. Create a QCOW folder somewhere to hold the output file we get.
qemu-img convert -f vmdk -O qcow2 ./output-windows/win2022-disk001.vmdk D:/QCOW/windows-2022.qcow2
KIND
We now have an image to run in Kubevirt, but first we need a Kubernetes cluster. We will use KIND to run the VM as it is supported by the Kubevirt project, and can run on Windows using Docker Desktop and WSL2.
Installation of WSL2 and Docker Desktop for KIND
It could be as simple as this though to install KIND, but your mileage may vary. If you already have Docker Desktop (https://www.docker.com/products/docker-desktop/) and WSL2 (https://kind.sigs.k8s.io/docs/user/using-wsl2/) installed then I’d avoid it and install KIND manually. See these instructions if either of the below fails: https://kind.sigs.k8s.io/docs/user/quick-start
Manual way (find a better path folder if you don’t want to dump it in System32)
curl.exe -Lo kind-windows-amd64.exe https://kind.sigs.k8s.io/dl/v0.23.0/kind-windows-amd64
Move-Item .\kind-windows-amd64.exe c:\windows\system32\kind.exe
If you don’t have WSL2 and Docker Desktop already, you can try this. It will install KIND and the dependencies.
choco install kind -y
WSL2 Tweak
There is also a tweak in WSL2 we need to perform. The default allocated memory for WSL2 for Docker will likely not be enough, so stop WSL and create/amend your users .wslconfig file to something like the below
# turn off all wsl instances such as docker-desktop
wsl --shutdown
notepad "$env:USERPROFILE/.wslconfig"
[wsl2]
memory=8GB   # Limits VM memory in WSL 2 up to 8GB
processors=4 # Makes the WSL 2 VM use more virtual processors
Then restart Docker desktop from its GUI.
We are getting there!
Setup Kubevirt
We should have the required basic tools installed and can now create a KIND cluster to host our VMs.
There is a quickstart guide here: https://kubevirt.io/quickstart_kind/
But this is what we will do.
Create a file called kind_config.yml. It will help us with a NodePort service we create later.
# https://stackoverflow.com/questions/62432961/how-to-use-nodeport-with-kind
apiVersion: kind.x-k8s.io/v1alpha4
kind: Cluster
nodes:
- role: control-plane
  extraPortMappings:
  - containerPort: 30000
    hostPort: 30000
    listenAddress: "0.0.0.0" # Optional, defaults to "0.0.0.0"
    protocol: tcp # Optional, defaults to tcp
And install kubectl
choco install kubernetes-cli -y
Then create our cluster like so
kind create cluster --name kubevirt --config=kind_config.yml
kubectl cluster-info --context kind-kubevirt
We should get our cluster info. KIND will automatically make this our Kubernetes context.
Kubernetes control plane is running at https://127.0.0.1:58905
CoreDNS is running at https://127.0.0.1:58905/api/v1/namespaces/kube-system/services/kube-dns:dns/proxy
And now we can install Kubevirt into the cluster. Kubevirt is what allows our cluster to become a hypervisor. There is a guide here: https://kubevirt.io/quickstart_kind/
These are the commands I used, which have hard coded the versions for simplicity
#  https://storage.googleapis.com/kubevirt-prow/release/kubevirt/kubevirt/stable.txt
kubectl create -f https://github.com/kubevirt/kubevirt/releases/download/v1.2.2/kubevirt-operator.yaml
kubectl create -f https://github.com/kubevirt/kubevirt/releases/download/v1.2.2/kubevirt-cr.yaml
Check it works, the outputs should be ‘Deployed’ and various things should be ‘Running’
kubectl get kubevirt.kubevirt.io/kubevirt -n kubevirt -o=jsonpath="{.status.phase}"
kubectl get all -n kubevirt
We should get a bunch of Kubevirt resources like below (more than shown here)
NAME                                   READY   STATUS    RESTARTS        AGE
pod/virt-api-75859b7b7-dn4sd           1/1     Running   5 (4d11h ago)   7d18h
pod/virt-controller-6855b4df79-4m7rn   1/1     Running   5 (4d11h ago)   7d18h
pod/virt-controller-6855b4df79-tzk5v   1/1     Running   5 (4d11h ago)   7d18h
...
Setup Virtctl
Then we install Virtctl to control Kubevirt VMs, much like kubectl. Grab the latest version here and move it into a system32 folder so it can be seen in our terminal (it’s not in Chocolatey…).
curl.exe -Lo virtctl.exe https://github.com/kubevirt/kubevirt/releases/download/v1.2.2/virtctl-v1.2.2-windows-amd64.exe
mv virtctl.exe c:\windows\system32\virtctl.exe
Setup a CDI
We also need a CDI (Containerized Data Importer) operator. This is the mechanism that we use to set up our VM disk images for Kubevirt to create our VMs. We can install that to our cluster like so.
kubectl create -f https://github.com/kubevirt/containerized-data-importer/releases/download/v1.59.0/cdi-operator.yaml
kubectl create -f https://github.com/kubevirt/containerized-data-importer/releases/download/v1.59.0/cdi-cr.yaml
Then, wait a minute or so and we should have some resources deployed and pods running.
kubectl get cdi cdi -n cdi
kubectl get pods -n cdi
Now, we can (almost) finally install and manage VMs with Kubernetes.
But wait… We need a place to host the QCOW2 file we created that Kubernetes can get to, and a web server is easiest (Perhaps there is a way to host it in the cluster, but I’m not sure).
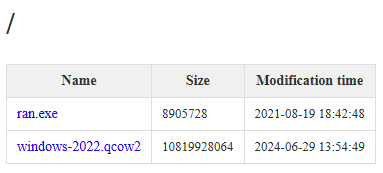
We can use a portable web server, but let’s avoid the messiness of Python and use a go binary. This isn’t production-ready, but fine for our needs. Download the zip and extract it to your local folder (or C:\Windows\System32). The -g switch turns off logging, and the -l means show logs. The D:\QCOW path is where our qemu-convert image we made earlier should be.
https://github.com/m3ng9i/ran/releases/download/v0.1.6/ran_windows_amd64.exe.zip
curl.exe -Lo ran_windows_amd64.exe.zip https://github.com/m3ng9i/ran/releases/download/v0.1.6/ran_windows_amd64.exe.zip
Expand-Archive .\ran_windows_amd64.exe.zip
mv .\ran_windows_amd64.exe\ran_windows_amd64.exe D:\QCOW\ran.exe
D:\QCOW\ran.exe -r C:\QCOW\ -l -g false
Then, we can reference the image like this (use your IP obviously): http://192.168.1.108:8080/windows-2022.qcow2. You should see the files in a browser like this.
The Kubevirt YAML files need to know where this web server is, and the LAN IP so it can find the image to download from inside the KIND cluster. Amend the kubevirt_win2022_dv.yml file to your machine IP (or the machine hosting the site) like below, and create these files with the names referenced.
kubevirt_win2022_dv.yml
apiVersion: cdi.kubevirt.io/v1beta1
kind: DataVolume
metadata:
  name: "kubevirt-win2022"
  labels:
    # insert any desired labels to identify your claim
    app: win2022
spec:
  storage:
    accessModes:
      - ReadWriteOnce
    resources:
      requests:
        storage: 52Gi
  source:
    http:
      url: "http://192.168.1.108/QCOW/windows-2022.qcow2"
kubevirt_win2022_pvc.yml
apiVersion: v1
kind: PersistentVolumeClaim
metadata:
  name: win2022
  labels:
    # insert any desired labels to identify your claim
    app: win2022
spec:
  storageClassName: standard
  accessModes:
    - ReadWriteOnce
  resources:
    requests:
      # The amount of the volume's storage to request
      storage: 64Gi
kubevirt_win2022_vm.yml
apiVersion: kubevirt.io/v1
kind: VirtualMachine
metadata:
  creationTimestamp: 2018-07-04T15:03:08Z
  generation: 1
  labels:
    kubevirt.io/os: windows
  name: win2022-vm
spec:
  running: true
  template:
    metadata:
      creationTimestamp: null
      labels:
        kubevirt.io/domain: win2022-vm
    spec:
      domain:
        cpu:
          cores: 2
        resources:
          requests:
            memory: 4096M
        firmware:
          uuid: 5d307ca9-b3ef-428c-8861-06e72d69f223
        devices:
          disks:
          - disk:
              bus: sata
            name: disk0
        machine:
          type: q35
      volumes:
      - name: disk0
        persistentVolumeClaim:
          claimName: kubevirt-win2022
kubevirt_win2022_svc.yml
apiVersion: v1
kind: Service
metadata:
  name: win2022-vm-nodeport
spec:
  externalTrafficPolicy: Cluster
  ports:
  - name: nodeport
    nodePort: 30000
    port: 27017
    protocol: TCP
    targetPort: 3389
  selector:
    kubevirt.io/domain: win2022-vm
  type: NodePort
Then we can actually deploy a VM!
Creating a VM
Create the required Persistent Volume Claim and Data Volume.
kubectl apply  -f kubevirt_win2022_pvc.yml
kubectl apply  -f kubevirt_win2022_dv.yml
Then, create the VM
kubectl apply -f kubevirt_win2022_vm.yml
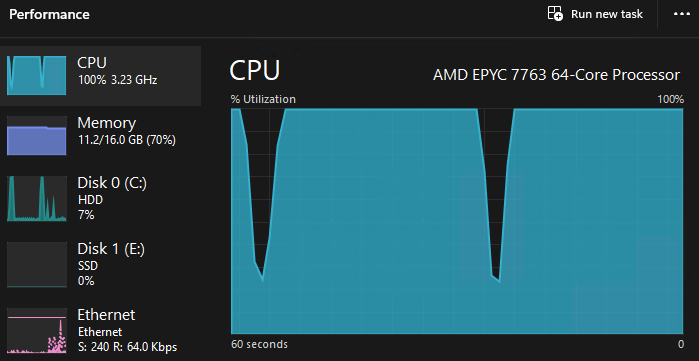
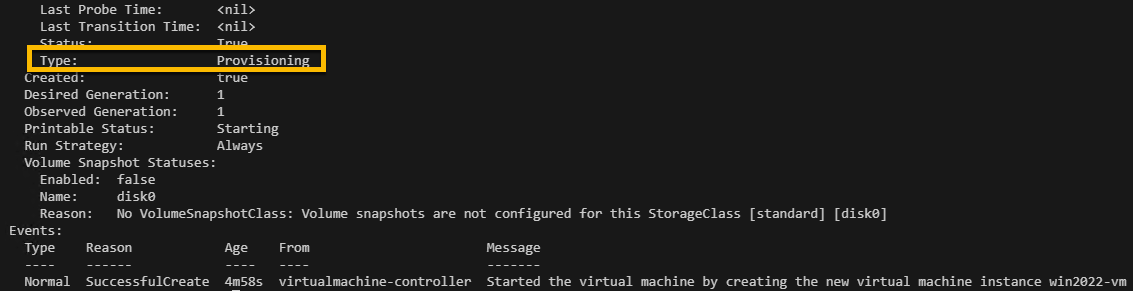
We can check the status with this command. But, it will take a long time for the QCOW2 image to be shuffled into the Kubernetes cluster, so be patient, and keep an eye on your disk IO and CPU. It should be running 100% CPU while it is provisioning the VM data (passing a 10GB image from a website to a Docker container, into a Kubernetes Cluster is resource intensive).
kubectl describe vm win2022-vm
And then we can see if it is alive! Run this command and you will, eventually, see a VNC screen with your Windows VM.
virtctl vnc win2022-vm
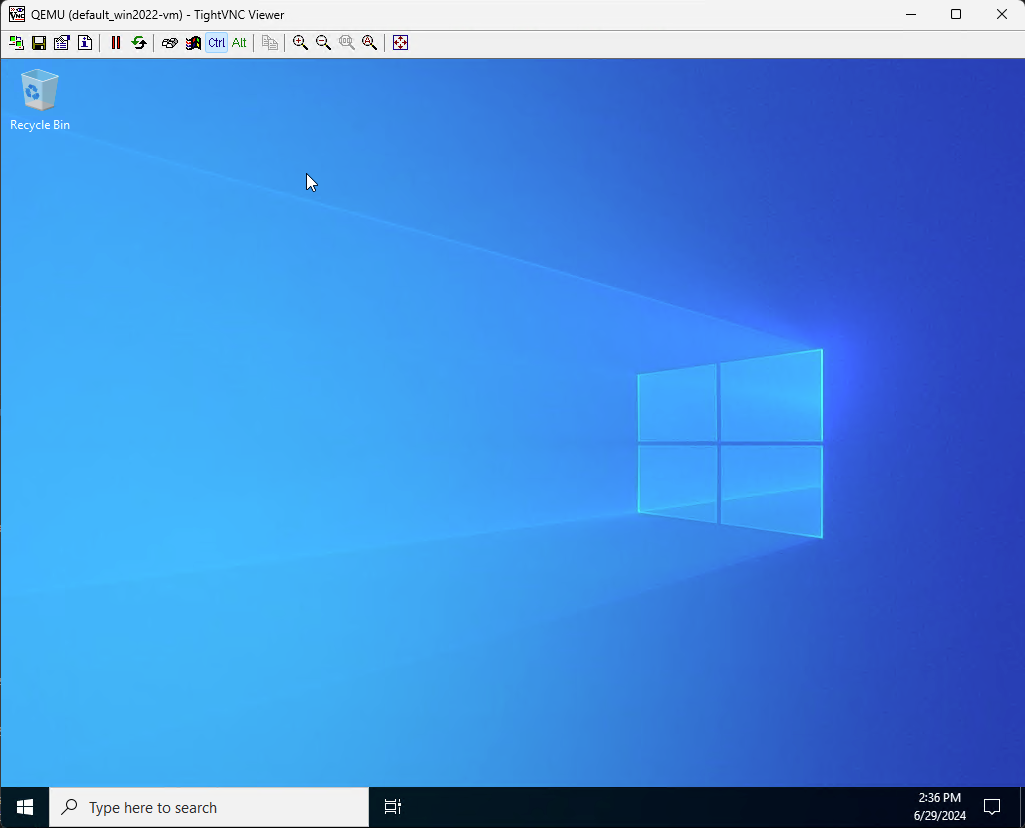
Also, apologies, you probably need to install vncviewer.exe to use the vnc command. I believe I downloaded TightVNC (https://www.tightvnc.com/download/2.8.84/tightvnc-2.8.84-gpl-setup-64bit.msi), installed it, and then copied the file C:\Program Files\TightVNC\tvnviewer.exe to c:\windows\system32\vncviewer in order to get it to work. Note I changed tvnviewer.exe to vncviewer.exe.
RDP to the VM
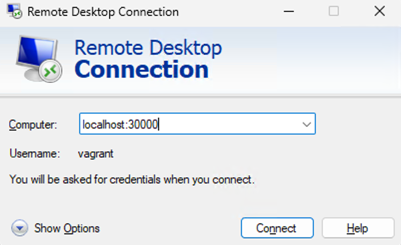
To RDP into the machine, we can set up a service. Run this command.
kubectl apply -f kubevirt_win2022_svc.yml
What it will do is set up a Nodeport connection over port 30000. So, to RDP we just have to RDP to our machine’s localhost port and port 30000 (remember the bit at the start with our kind config file, that was us exposing that port).
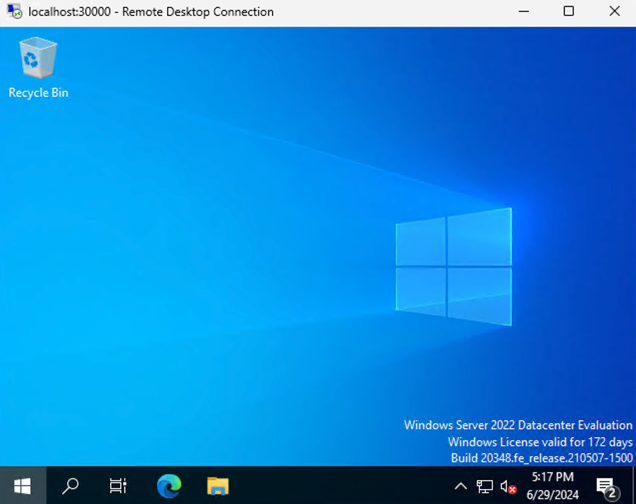
And if you are on an external machine, you can RDP to the Kubevirt Windows VM using the server ip and port 30000, awesome.
Taskfiles
To try and tame the complexity of the many commands, I created a Taskfile to simplify things. Taskfile is like a modern implementation of Make and is available for all OS’s as a single binary file to install. This file is for Windows machines, but the tasks should be amendable for Linux or Mac if required. We can install Taskfile like this (or see here: https://taskfile.dev/installation).
choco install go-task -y
Then, we can create a file like this called Taskfile.yml.
version: '3'

tasks:
  build-and-run:
    - task: build-image
    - task: create-vm

  build-image:
    cmds:
      - powershell -command 'if (Test-Path 'output-windows') { Remove-Item -Path 'output-windows' -Recurse -Force }'
      - powershell -command 'if (Test-Path "$env:USERPROFILE\VirtualBox VMs\win2022") { Remove-Item -Path "$env:USERPROFILE\VirtualBox VMs\win2022" -Recurse -Force }'
      - packer build ./windows.pkr.hcl
      - qemu-img convert -f vmdk -O qcow2  ./output-windows/win2022-disk001.vmdk D:/QCOW/windows-2022.qcow2

  create-vm:
    cmds:
      - kubectl apply  -f kubevirt_win2022_pvc.yml
      - kubectl apply  -f kubevirt_win2022_dv.yml
      - kubectl apply  -f kubevirt_win2022_vm.yml

  status-vm:
    cmds:
      - kubectl describe vm win2022-vm

  vnc-vm:
    cmds:
      - virtctl vnc win2022-vm

  stop-vm:
    cmds:
      - virtctl stop win2022-vm

  start-vm:
    cmds:
      - virtctl start win2022-vm

  delete-vm:
    cmds:
      - kubectl delete  -f kubevirt_win2022_pvc.yml
      - kubectl delete  -f kubevirt_win2022_dv.yml
      - kubectl delete  -f kubevirt_win2022_vm.yml
Now, to build an image and start a VM, we can run this
task build-and-run
And to delete it, we can run this
task delete-vm
There are a couple more, to see what is available (easy to forget) simply run task --list-all
task: Available tasks for this project:
* build-and-run:
* build-image:
* config-kind-cluster:
* create-and-config-kind-cluster:
* create-kind-cluster:
* create-svc:
* create-vm:
* delete-kind-cluster:
* delete-vm:
* install-crds-kind-cluster:
* nodeips-kind-cluster:
* start-vm:
* status-vm:
* stop-vm:
* vnc-vm:
A very nice simplification, and something I am going to use more of in the future.
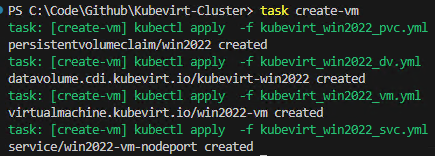
Here is a screenshot of creating a VM so you can see how it works.
Speed Run with Taskfile
If you have Packer, VirtualBox, Virtctl, and Kubectl installed, you can do more of a speedrun to recreate a cluster from scratch with the help of Taskfile. You can start from zero to a full cluster like this.
task delete-kind-cluster
task create-and-config-kind-cluster  # Wait a minute for things to install. If anyone knows a simple command to wait for everything to get ready, let me know!
task build-and-run-vm
task vnc-vm
Amazing!
If you made it this far I salute you. It was a lot to do, but hopefully, someone found it helpful!
Here are some other blogs I found which might be helpful as well