I thought I would blog about how to create a static website on your own domain with an HTTPS certificate for very little money in Azure. A static website is simply one which has no backend server like PHP or ASP generating the pages dynamically. Instead, you can either just write static HTML files or use something like Jekyll to ‘compile’ a site from some rules and give you the content to publish as an update. This is what I do and it works great as everything can be kept in a git repo. And the files are small for a basic blog with just text and pictures.
Here is the cost of running this website for the last month. It’s practically free!

The process of setting up a custom domain static site is quite simple but it is easy to get some bits wrong so I thought I would document it from start to finish for my own long-term knowledge, and for anyone else struggling to figure it out.
On a side note, you can actually do all this (git repo, compiling and hosting) for free on GitHub Pages, so try that if you don’t want to go down this route, but it will be very educational to do the bits and bobs yourself. This guide is good if you do want to go the GitHub route - http://jmcglone.com/guides/github-pages/
But, if not, keep reading…
Buy the Domain Name
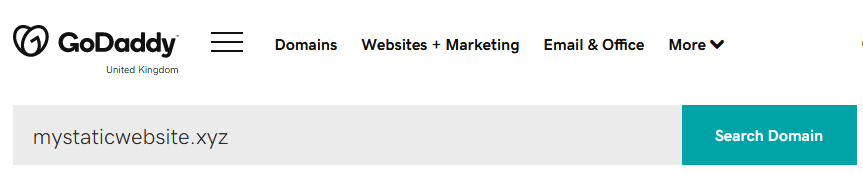
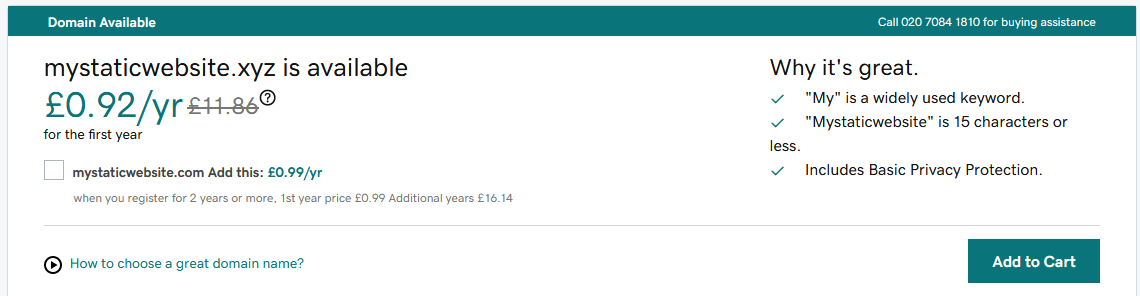
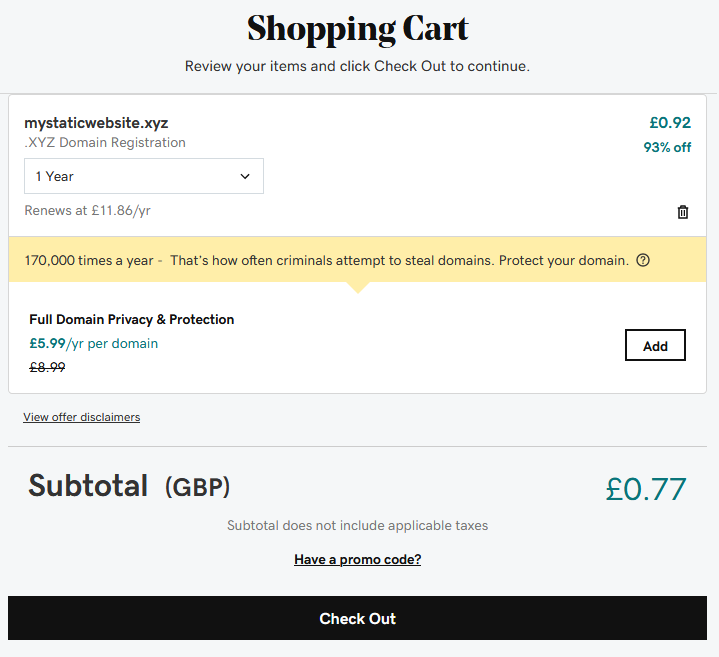
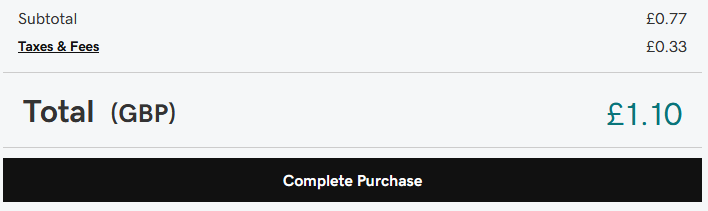
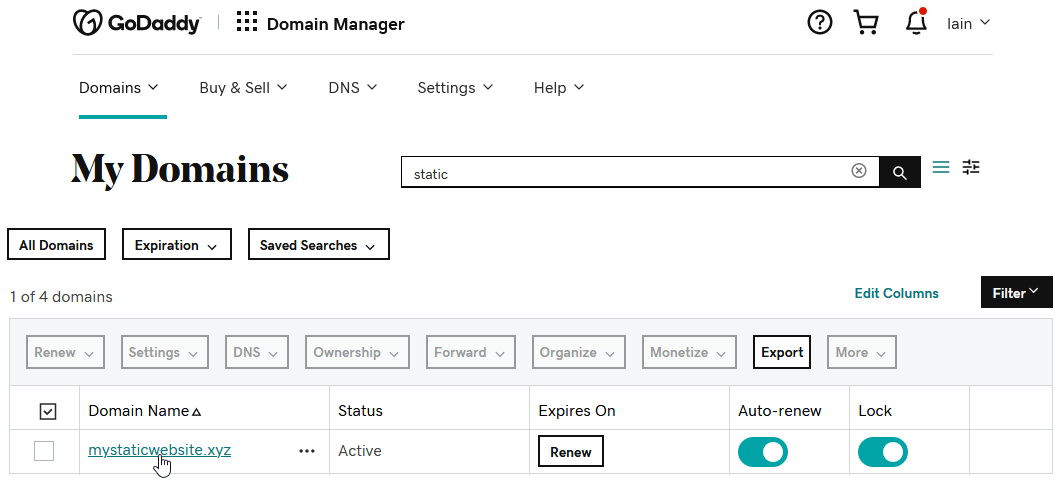
First, buy a domain name so we can get to the site we create. I use GoDaddy and i’ve never had a problem with them, but any registrar should do the job. I’m using an XYZ domain name in this example because it is cheap! Feel free to get a decent .com instead. Don’t buy any extras that GoDaddy offer, you probably don’t need them. Make sure you do no put something like a mobile phone number in the details when you purchase otherwise you will get calls from random people looking through whois for people to scam and create a website for. An example of a purchase using GoDaddy is below.
Done. We can now start setting up our storage to host the site.
Setup Azure
I’m going to assume you have an azure account. If not, sign up here - https://azure.microsoft.com/en-us/free/. This will assume some basic idea of Azure but it should be easy to follow.
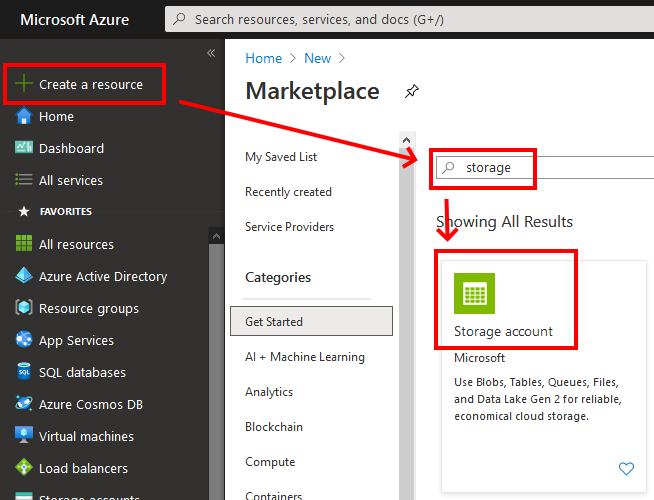
Create a Blob Storage Account
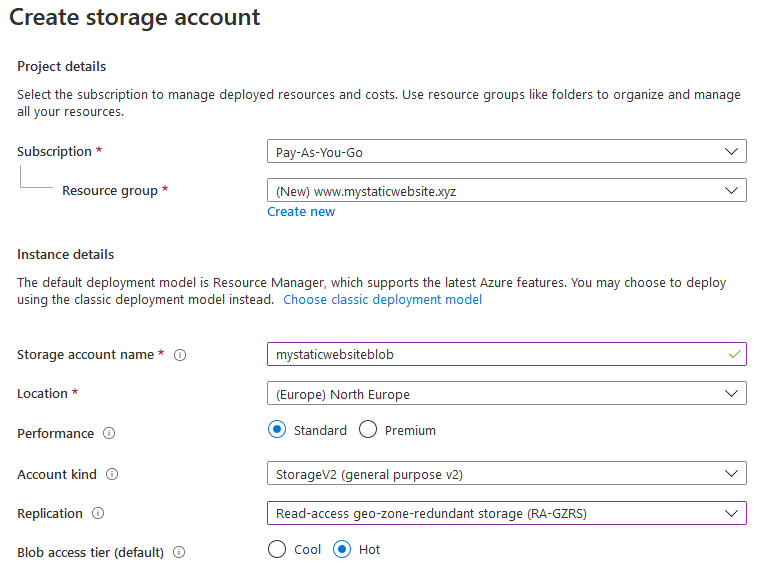
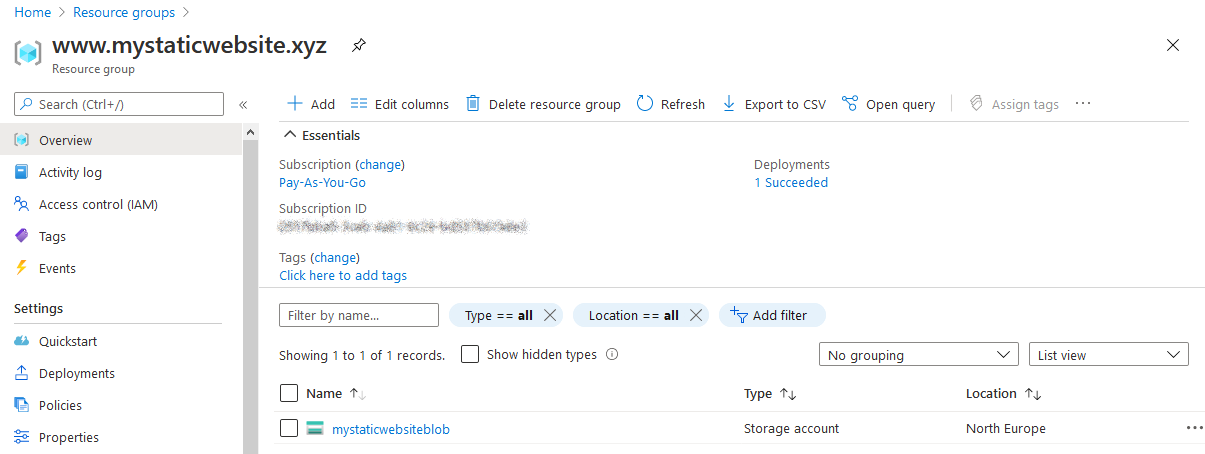
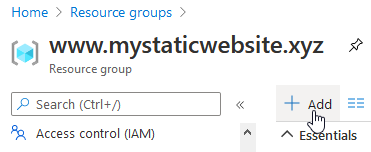
The first thing we need is a storage account inside a new resource group (the folder that holds everything essentially if you don’t know what a resource group is). I just call this www.mystaticwebsite.xyz for ease of reference.
Storage blobs are very cheap for small amounts of data in the MB range. Check the pricing here - https://azure.microsoft.com/en-us/pricing/details/storage/blobs/. Unless you are uploading GB’s of files, the best option should still be very, very cheap. Here is a thorough explanation of the different options - https://docs.microsoft.com/en-us/azure/storage/common/storage-redundancy. Below is my simplistic guide.
| Replication Level | Price | Notes |
|---|---|---|
| LRS (Locally Redundant Storage) | £0.0164 per GB | Most basic. Data is replicated in a regions single data center site 3 times. A single zone essentially. |
| ZRS (Zone-Redundant Storage) | £0.0172 per GB | Data replicated at the specified region but across 3 nearby (tens of miles) data centers (zones) |
| GRS (Geo-Redundant Storage) | £0.0275 per GB | Data is replicated to a secondary region but it is only made available in event of the primary region having an outage |
| RA GRS (ReadAccess Geo-Redundant Storage) | £0.0343 per GB | Like above, but your data is always available read-only if the primary site has an outage |
| GZRS (Geo-Zone-Redundant Storage) | £0.0318 per GB | Like GRS and ZRS mixed together. Data replicated to two regions and 3 sites at each region |
| RA GZRS (ReadAccess Geo-Zone-Redundant Storage) | £0.0397 per GB | Like above but data is available read-only at any of the secondary sites zones if primary site has an outage |
Now, given that your site is likely in git and you don’t mind an outage on, say a blog site, feel free to choose LRS, the most ‘risky’ option. It would take a single data center failure to take it down, an unlikely event in itself. But, given the site will be almost certainly under a gigabyte in size i’d just go for the most opulent option. The files that make up this site as of now come to a size of under 5 MB. So, cost of storage is £0.0397 (RA GZRS) * 0.05GB which is about £0.002p a month. I’d say just splurge out on the best. Even a 10GB website would cost about £0.40p a month. This doesn’t include bandwidth cost of uploads/downloads, and the first 5GB is free, but you can see that the cost for a simple site is still pennies at £0.065 per GB in the North Europe region.
Blob Storage Creation
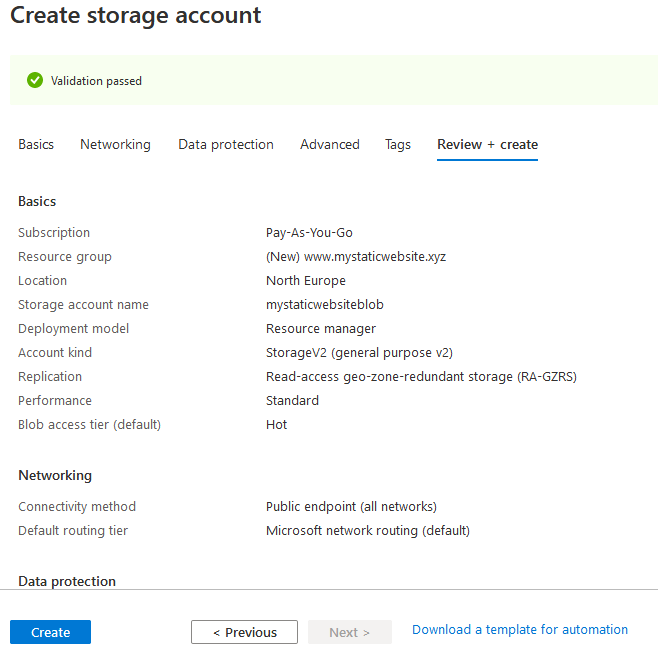
Create the blob like below, accept all default options after the name, replication etc… screen. In this example, we don’t need the advanced options of file versioning and soft deletions as the site is kept in git so nothing can really go wrong. In a real critical file keeping scenario these may be valuable settings and should be investigated.
Once created, it should be in your resource group.
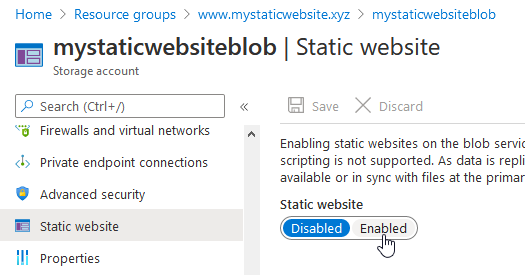
The first thing to do is enable ‘Static Website’ and hit save.
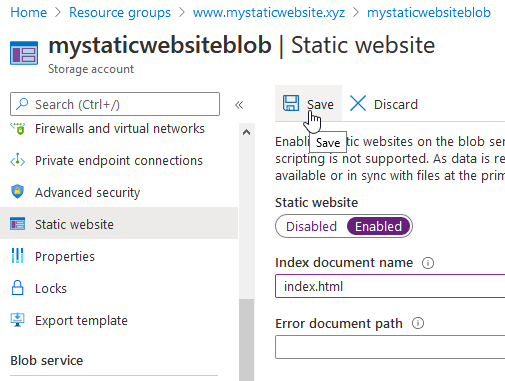
Once enabled, enter an index document name of ‘index.html’. This is generally the root page of a website. If you know yours will be different, enter it here, and save the setting.
Add an index.html
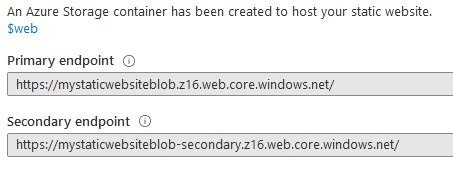
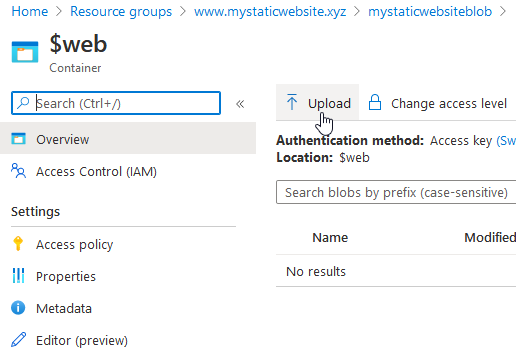
We now have a live site we can access. Note that we now have a $web folder where we place static website related files.
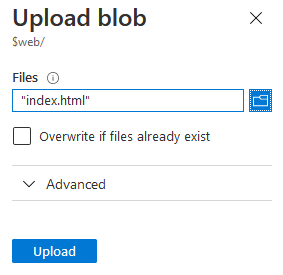
We just need an index.html file so we can browse and check it works as expected.
Create a file called index.html like below on you computer using notepad or something similar.
<!DOCTYPE html>
<html>
    <body>
        <h1>Static Site</h1>
        <p>A great website!</p>
    </body>
</html>
Then, go to the storage account, Containers and the $web folder. Then upload it to the $web folder.

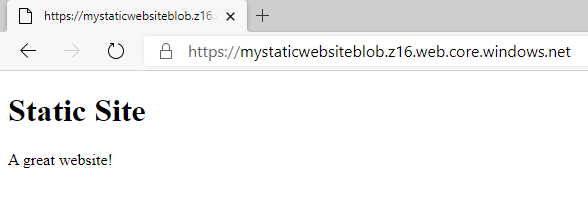
Now, we can browse to https://mystaticwebsiteblob.z16.web.core.windows.net/ and see what happens.
Success!
But, it’s not setup to use an HTTPS connection which isn’t ideal nowadays. Now, we can look at how to use our domain name and get a free HTTPS certificate from Azure.
Custom Domain Setup
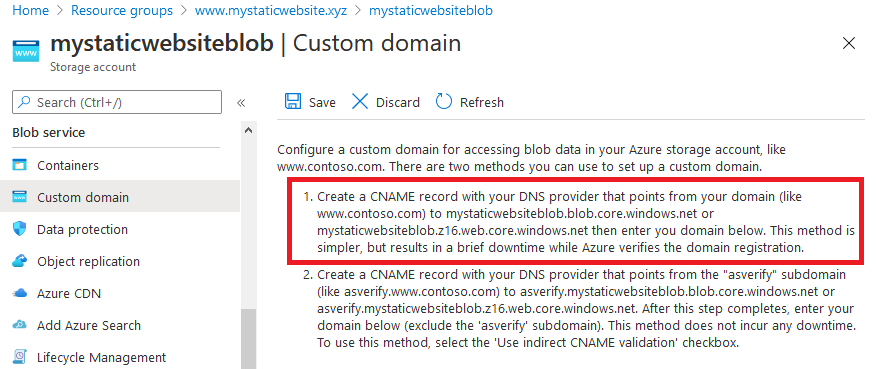
From the azure blob storage page we get some instructions to follow if we want to use a custom domain. We will choose the first option. But we first have to make a change to our DNS so azure can check that we own the domain. I tried both DNS names suggested, but only the one with the ‘z16’ worked. Not sure why, so just use that one of the two (ie mystaticwebsiteblob.z16.web.core.windows.net) if following along (and it might not be z16, use your one instead going forward).
Blob Storage Domain Name DNS Settings Changes
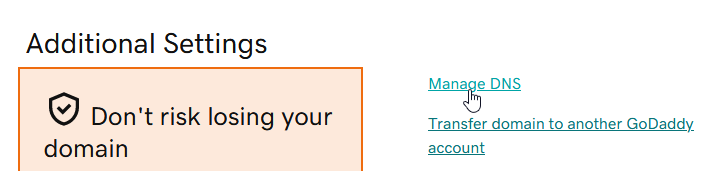
Go back to GoDaddy and make a change to our DNS settings to create a CNAME. Go to ‘Domains’ and choose your domain.
Then, scroll down a bit and and find the ‘Manage DNS’ option (ignore the other stuff it’s just GoDaddy wanting to make you buy web services from them).
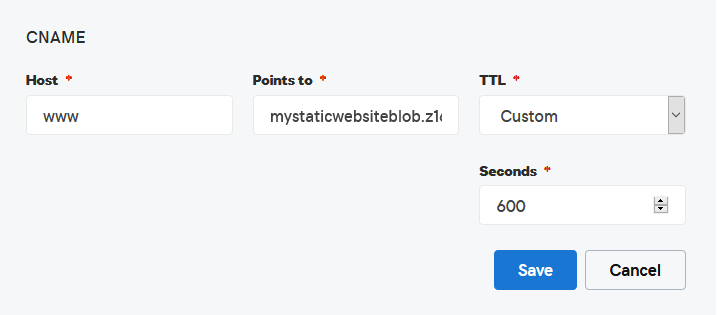
We actually already have a ‘www’ CNAME entry already, GoDaddy have set it up for us so we just have to amend it. Click the little pencil to edit the entry.

Change the ‘@’ value to ‘mystaticwebsiteblob.z16.web.core.windows.net’. I also change the TTL to something low just in case I make a mistake and don’t want to wait too long for the update to be noticed. 600 seconds is the minimum GoDaddy allows. Hit save. We now have set www.mystaticwebsite.xyz to point to the ‘z16’ azure blob storage static site address.
Azure Blob Store Custom Domain
Go back to Azure and our blob storage, and the ‘Custom Domain’ option. Enter in our website name and hit save. Don’t tick ‘Use indirect CNAME validation’ as that is only for option 2.
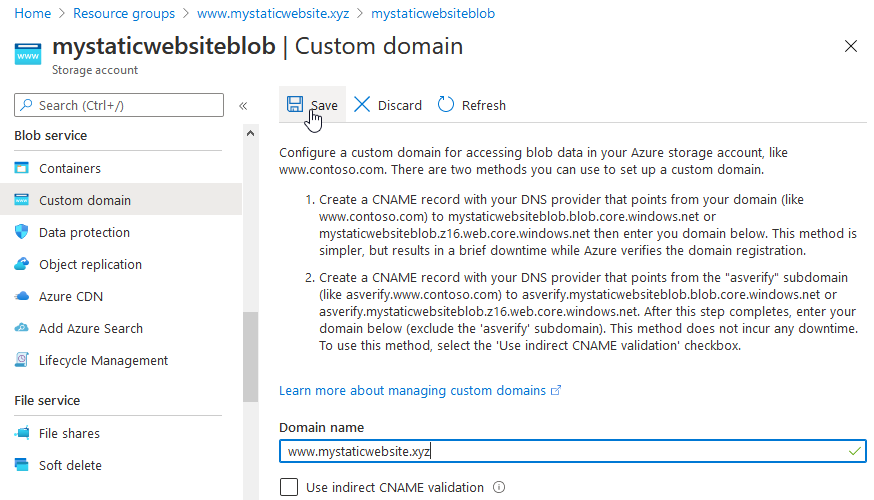
It should succeed! Mine actually failed first time, I just hit it again. DNS can take time to propagate and so it may take a little time to verify the change, so just wait a few minutes if this happens.
Now, go to the http://www.mystaticwebsite.xyz site, it should be live!
Arggh, error.
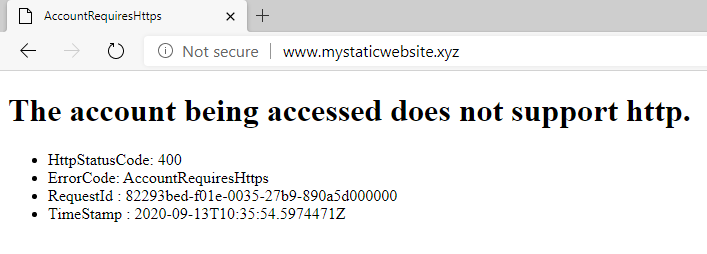
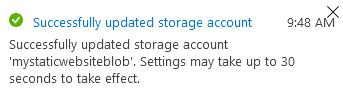
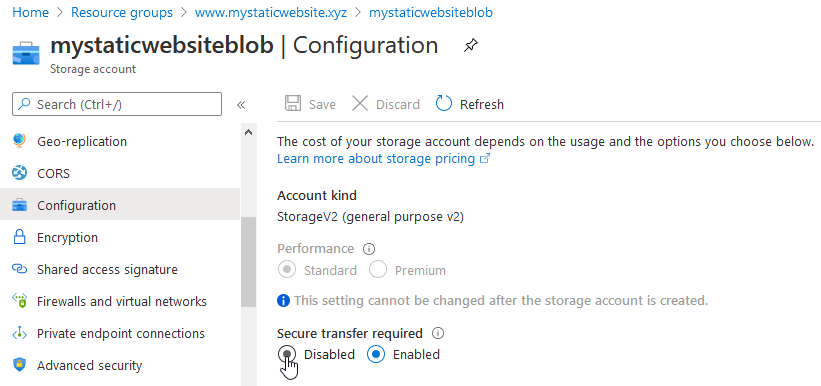
What happened? Well, we are trying to access this site over a non-secure protocol (HTTP) and we have told the blob storage not to allow this. So, jump into the ‘Configuration’ settings page and disable ‘Secure Transfer Required’ and hit save. We will make this secure only again once we get an HTTPS certificate in place.
Retry the page.
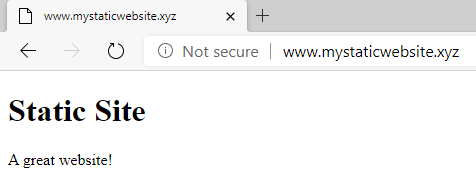
Success!
Creating an HTTPS Enabled Site with a CDN
The next step is to involve a CDN (Content Delivery Network). Now, we don’t exactly need this but if we enable it we can get a free HTTPS certificate and because it is a consumption cost model it will be pennies to implement and avoid us buying ‘real’ cert or create complexity in setting up Let’s Encrypt.
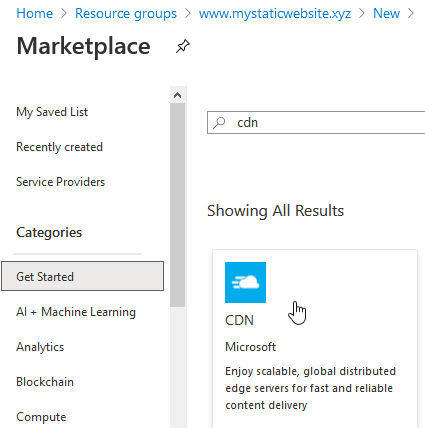
Create a CDN
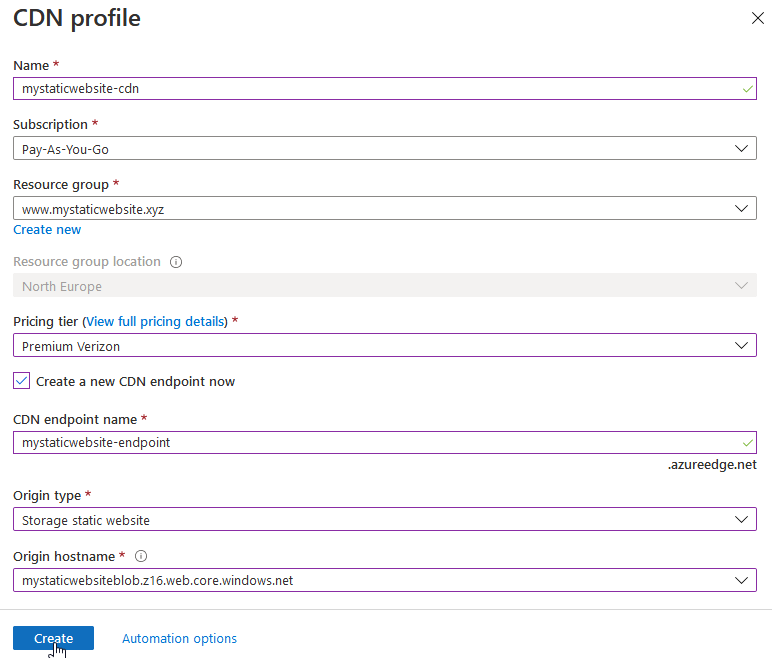
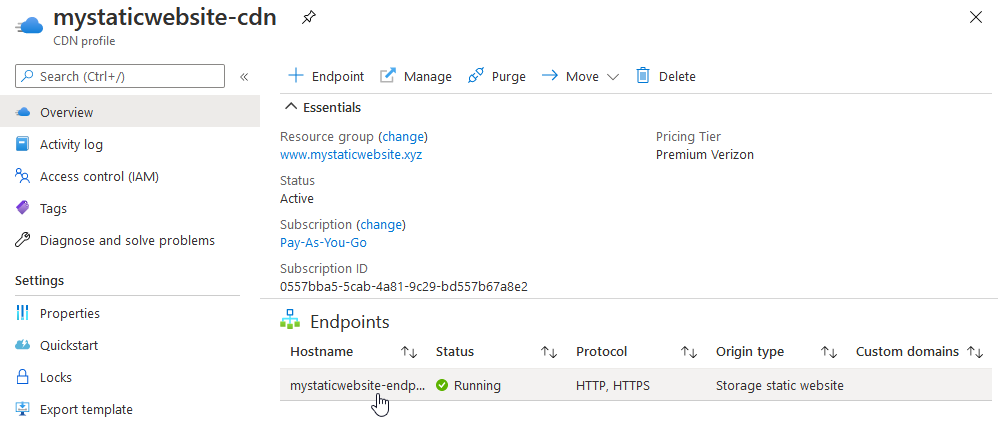
We will create a CDN to get our site up to the HTTPS level. There are 4 options, see here https://docs.microsoft.com/en-us/azure/cdn/cdn-features. We will go for Verizon Premium because it has a rules engine (not something we will really use apart from the ability to setup an HTTP to HTTPS redirect, which I don’t bother doing anyway) and real-time usage stats which is pretty cool. And the cost will be pennies for a site of our size, so just do it! Once created you can hit the ‘Manage’ button to access all this but I don’t go into it on this post.
Choose to add a resource from our resource group. Choose a Microsoft CDN (don’t worry, the Verizon option is in this one).
Then, enter the options like below. Be sure to choose to create a CDN endpoint in this dialog box. Some options are dropdowns so you don’t have to type in too much and it should be fairly intuitive to just copy what I did.
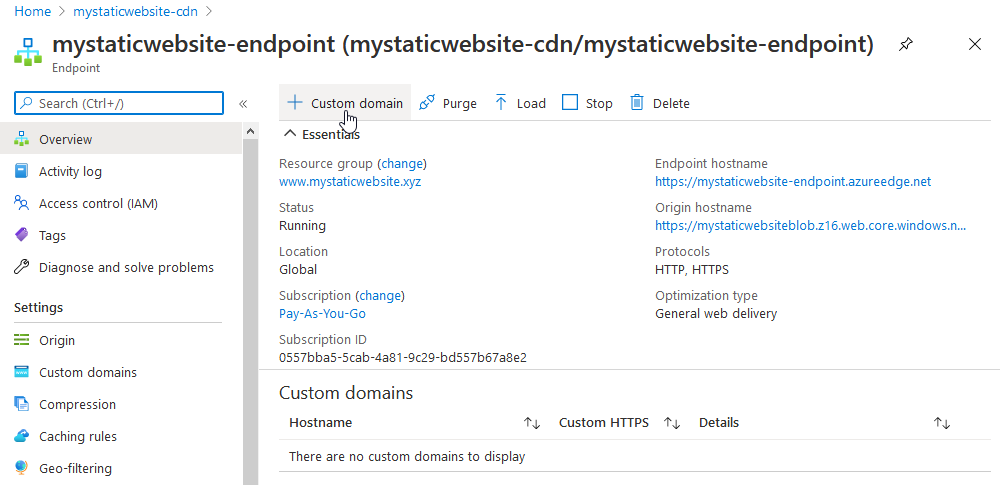
Once created, click on the endpoint
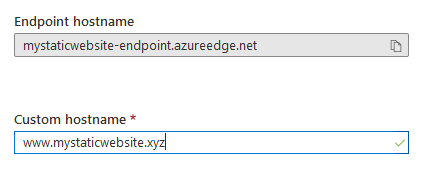
Then choose to add a custom domain
But, we need to update our www DNS entry to show we own the domain.
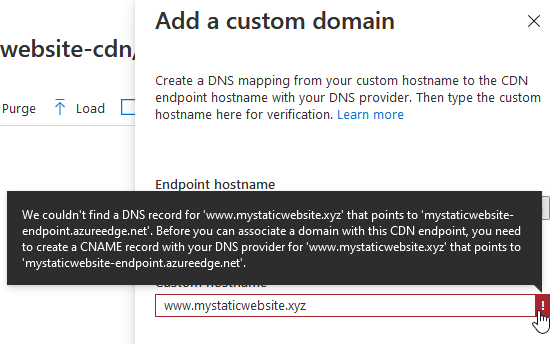
So go back to GoDaddy and update our www record.
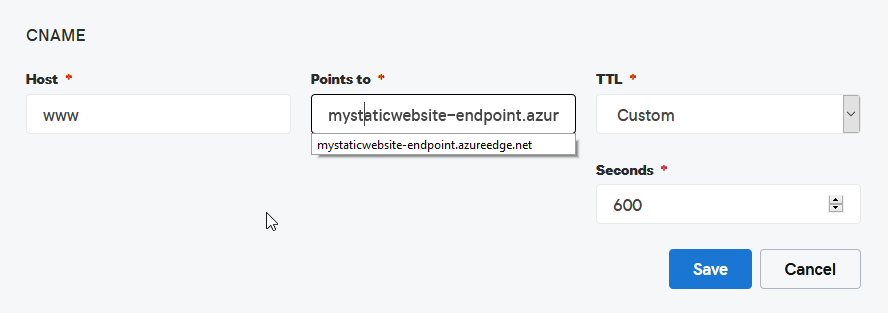
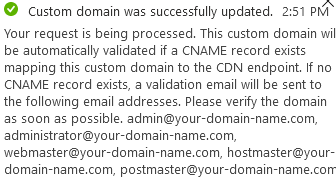
The azure custom domain should now be accepted so add it again.
And then, we wait for it enable. It took a while to do stage 2 (say 30 minutes) and then it took a good 7-8 hours for the certificate to be replicated across all CDN zones.
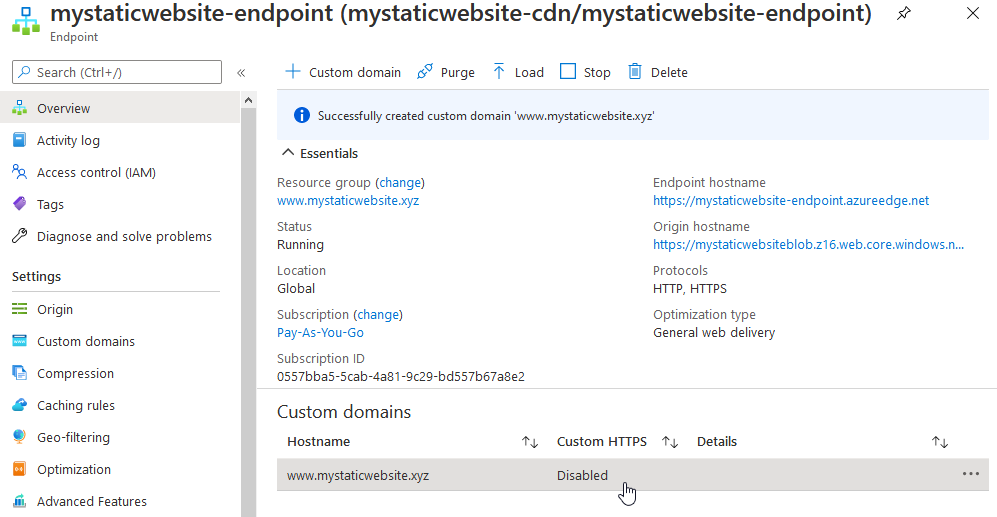
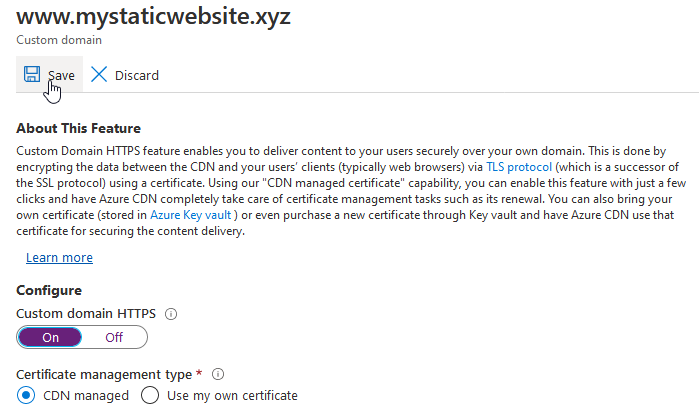
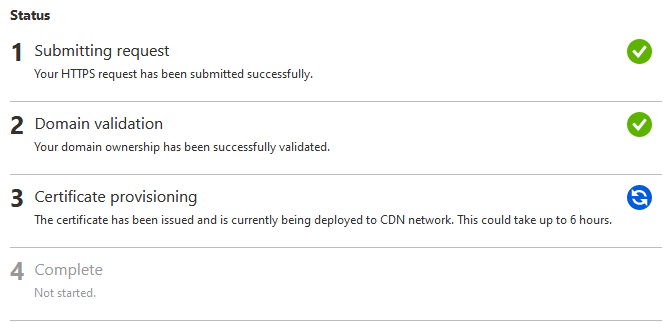
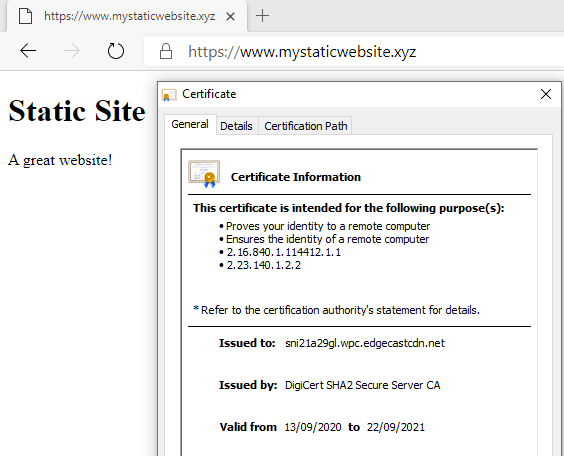
But, eventually… success!

And a working secure website :)
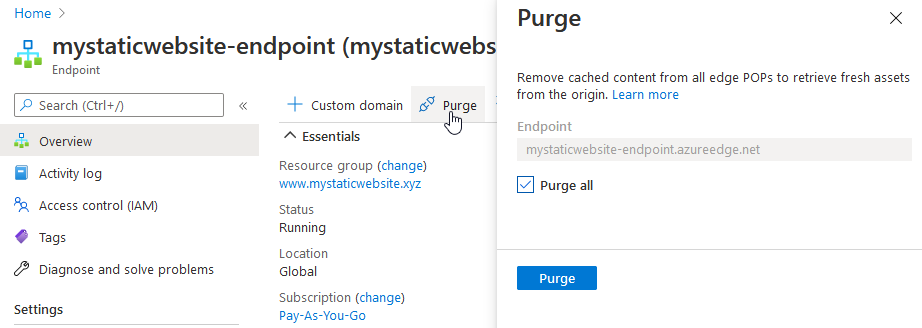
CDN Caching
One thing to note is that if making an update to your site you need to purge your CDN cache. Simply click the purge button and purge all to ensure the CDN gets a copy of your changes. If you don’t you will get very confused as to why nothing is changing when you upload new files.
If you want to do this programmatically, you can run something like this using the az command line tools.
az cdn endpoint purge --resource-group "www.mystaticwebsite.xyz" --name "mystaticwebsite-endpoint" --profile-name "mystaticwebsite-cdn" --content-paths "/*"
See here for setting up a Jekyll static website using Azure DevOps. It updates this site on a git push.
{https://www.rootisgod.com/2020/Setting-Up-an-Azure-DevOps-Build-Pipeline-for-a-Jekyll-Website-on-Azure-Blob-Storage/}(https://www.rootisgod.com/2020/Setting-Up-an-Azure-DevOps-Build-Pipeline-for-a-Jekyll-Website-on-Azure-Blob-Storage/)
And that’s it. Enjoy a cheap static site and an easy HTTPS certificate thanks to the consumption model of the cloud!